This tutorial explains how to extract data from any arbitrary data source with API and perform any ETL/ELT before loading into your data warehouse, i.e. BigQuery, Redshift or Snowflake.
Github repository with code

Project outline
You will find how to:
Create a PayPal account with developer access and a Sandbox and mock test transactions
Create a PayPal data connector with AWS Lambda

About the idea
BUILDING A DATA WAREHOUSE:
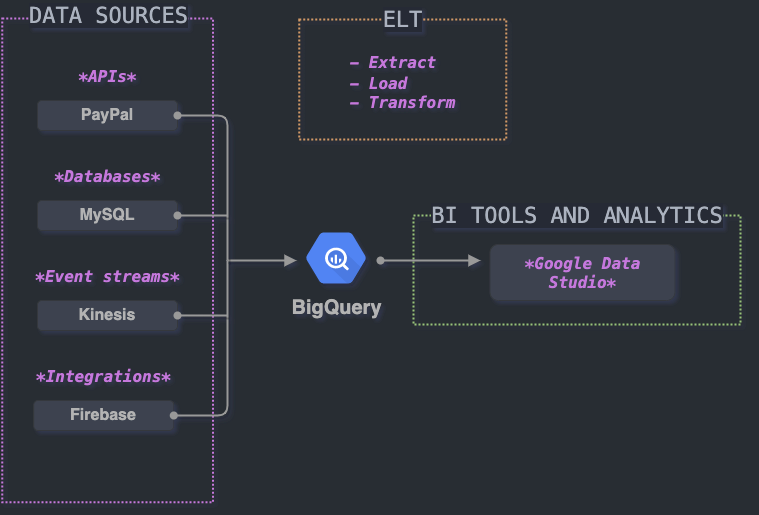
Usually you would want to put your data warehouse solution (BigQuery, Snowflake or any other) in the center of the diagramme.
- Connect any external data source with ease, i.e. setup a pipe to get data from PayPal API and save to the Cloud.
- Load data into BigQuery (AWS S3 to BigQuery ingest manager with Node.JS)
- Create documented data transformation pipelines with Git, CI/CD. For example, with Dataform
- Simplify and automate deployment with Cloudformation or Terraform (Infrastructure as a code)
- Create BI reports with Google Data Studio (for example, revenue reconciliation, etc.)

MODERN DATA STACK TOOLS (not a complete list of course):
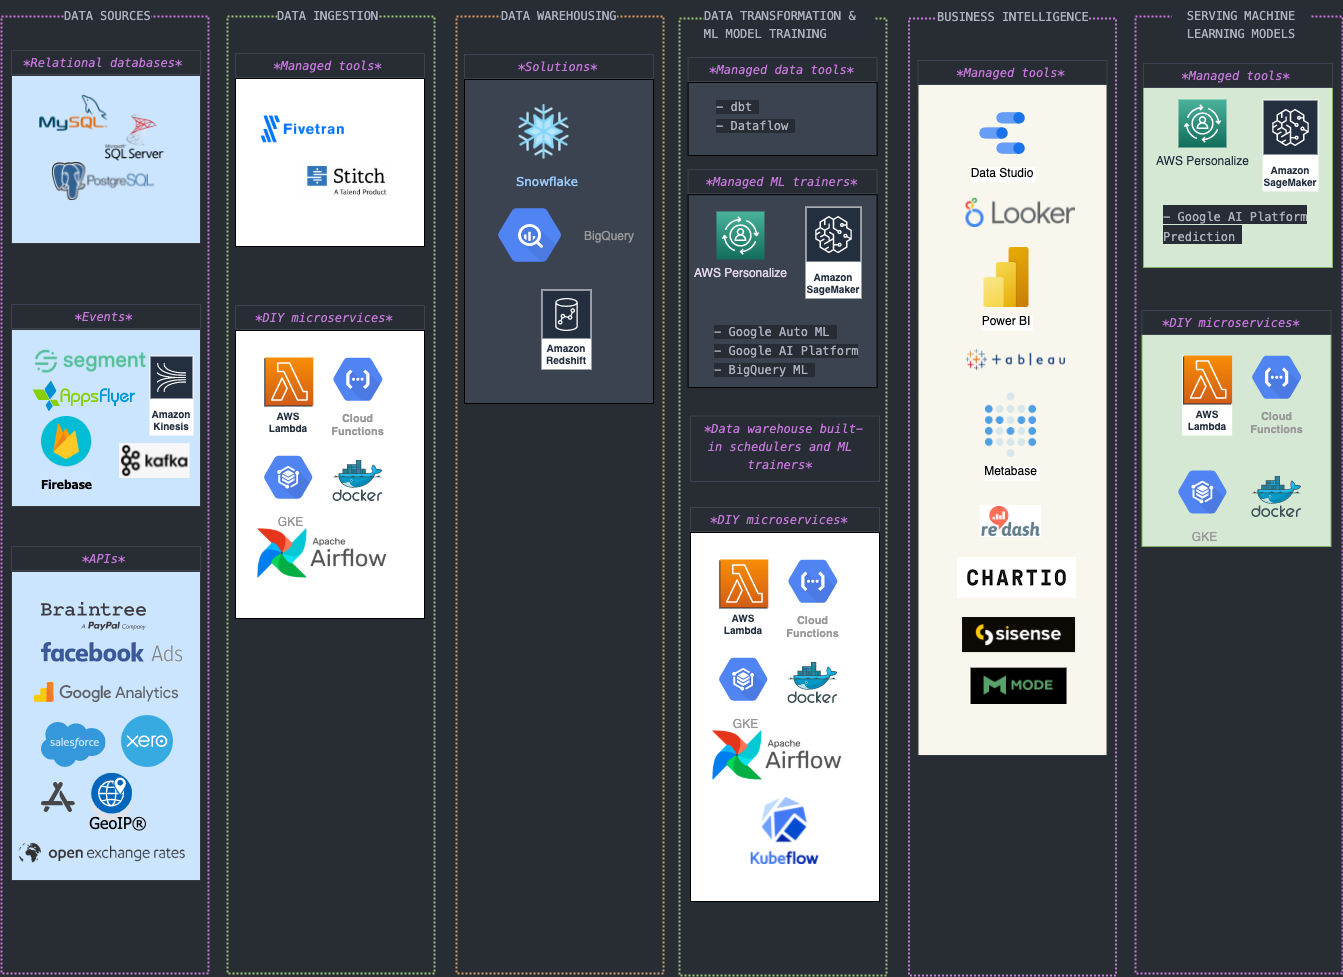
Talking about data extraction and ingestion you would want to use paid and managed tools like Fivetran or Stitch to extract data from any arbitrary data sources (i.e. Payment merchant providers, Exchange rates, Geocoding databases, etc.) but if you follow this tutorial you will become totally capable of doing it yourself.
Real life scenario for Data Engineers
Imagine you are a Data Engineer
You are working on a project connecting various data sources into your data warehouse in BigQuery. Your company is a mobile game development studio and have various products being sold on both platforms, IOS and ANDROID.
YOUR STACK
Your dev stack is hybrid and includes AWS and GCP. Your team use Node.js a lot.
Data science team use Python but server and client data pipelines are being created using Node.
Your data stack is modern, event-driven and data intensive.
Data warehouse solution must be cost-effective and flexible enough so you could add any data source you need.
It must be able to scale easily to meet growing data you have.
THE TASK
All data comes from files from varioius data surces, i.e. databases, kinesis firehose streams and various notification services. It is being stored to your Cloud Datalake in different formats (CSV, JSON, PARQUET, etc.).
As a data engineer you were tasked to create a new data pipeline to feed financial data from PayPal into the data warehouse. Finance team will use it to analyse revenue reconciliation reports in Google Data Studio daily.
You decided to use AWS Lambda functions and Node.js to extract data daily from PayPal transaction API and save to AWS S3 first.

This simple pipeline will ensure data is saved and prepared for loading into BigQuery later where it will be organised into tables.
Prerequisites, Libraries and setup
TOOLS
TECHNIQUES
- You must understand Node.JS basic concepts, i.e. async funcitons, Node packages and how the code works.
- basic debugging (consoles, print statements)
- loops: i.e. for
- branches: if, if/else, switches
Let's begin
Step 1. Create a PayPal account with developer access and a Sandbox
Go to developer.paypal.com and create an Application. This would be an integration for your Node.js app.
Create a sandbox account to integrate and test code in PayPal’s testing environment.
Populate your testing environment with some transaction data
Try to CURL this data from PayPal reporting API.
If any of these steps cause difficulties please refer to Hints section below.
Step 2. Create a local Node.js app called bq-paypal-revenue on your machine. This app will do the following:
Connect to your PayPal account and use PayPal API Authorization token to extract transaction data, for example, for yesterday.
Use a configuration file called ./config.json which will have all setting how to access and save your data. For example, you might want to name of your file with the same prefix as the name of the table in your data warehouse.
Send http request to PayPal API to get transaction data and save the result as JSON file into your AWS S3 bucket.
Run locally with npm run test command
Deliverable
The deliverable for this project is a working Node.js App which would be able to run locally and deployed in AWS account as a lambda function.
Feeling stuck? By author a coffee and ask a question.
Help

STEP 1: PayPal Sandbox
- Use an access token to query PayPal API. More info how to get an access token can be found here
- PayPal API basics explains how to create live and sandbox PayPal accounts. Try to create a sandbox. Another usful link would be PayPal Sandbox testing guide which explains the testing process and provides some tips on creating your PayPal developer account.
-
Use your Sandbox
client_id:secretand add it to a CURL request: - as a result you will see something like this:
-
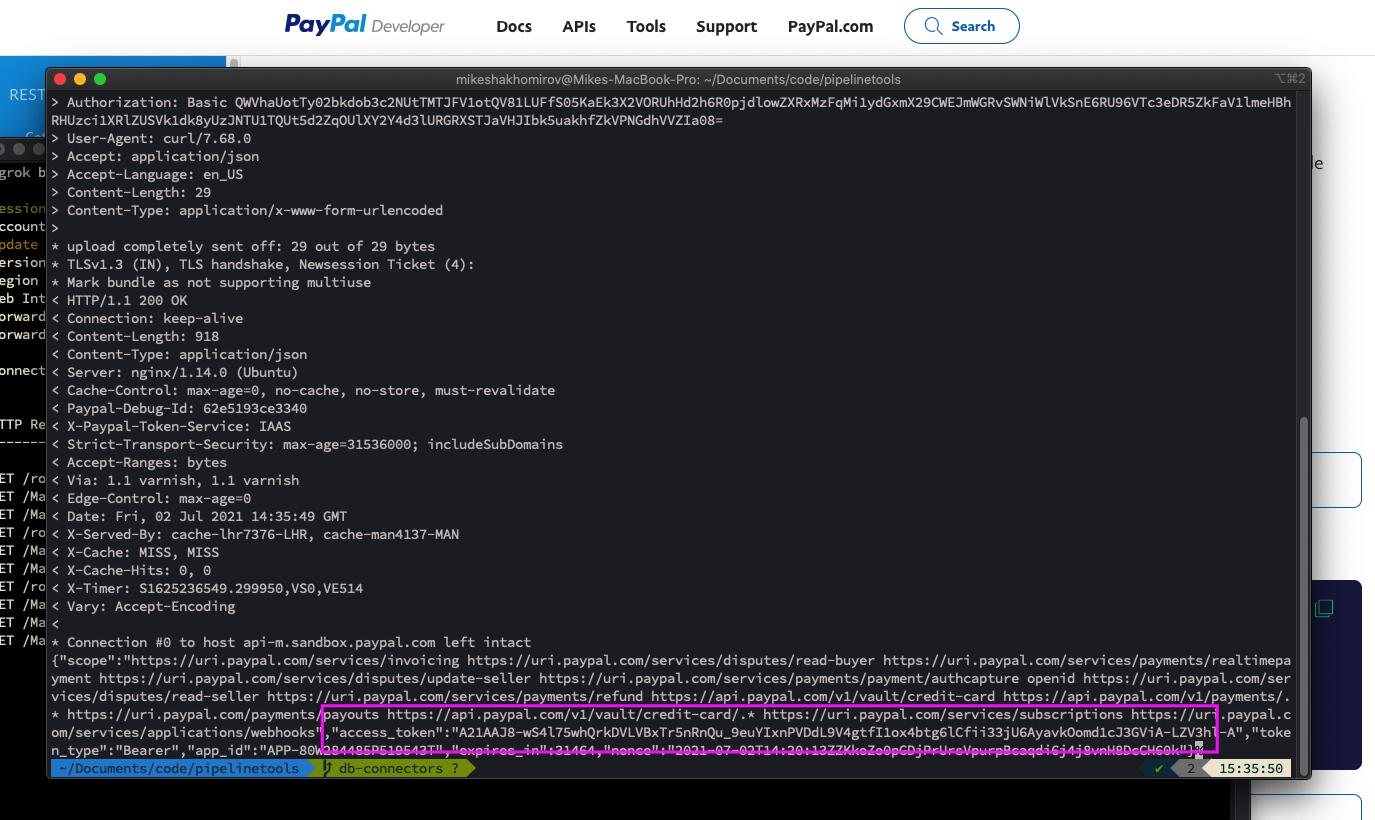
Image by author @mshakhomirov -
Now you can use this access token to create another request to pull the transaction or any other data you need, for example Invoices, etc. Re-use the access token until it expires.
Then, get a new token. The idea is to automate the process so in Step 2 we will create a microservice to get data from PayPal programmatically.
Replace '<\Access-Token>' with a token from the previous step. You will see something like this:
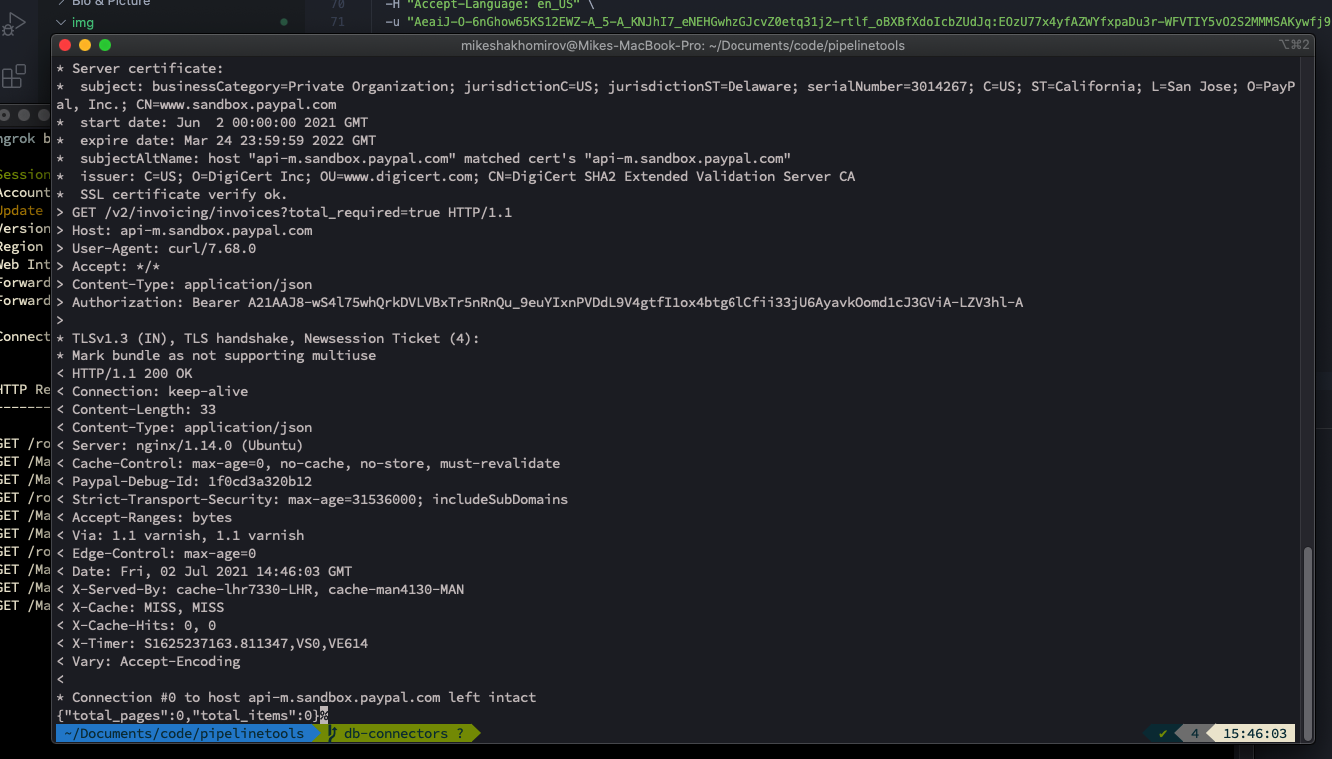
Image by author @mshakhomirov You can see that there are no transactions yet.
STEP1: How to mock test PayPal transactions
-
The easiest way to create sample transactions in your Sandbox is to use
PayPal Product API Executor

Image by author @mshakhomirov -
You would want to use PayPal Checkout Standard and to create a completed transaction the flow would be:
- Get an access token
- Create Order (Authorise and Capture). The default intent for Express Checkout is Capture and captures the funds straight after transaction was approved by buyer. Read more about Authorisation here.
- Approve Order (Buyer approves the order and is happy to pay)
- Update Order
- Capture Payment for Order
- Show Order details
-
Create an Order (Replace the phrase after 'Bearer with your token'):
As a result you will see that some sample transaction was created:
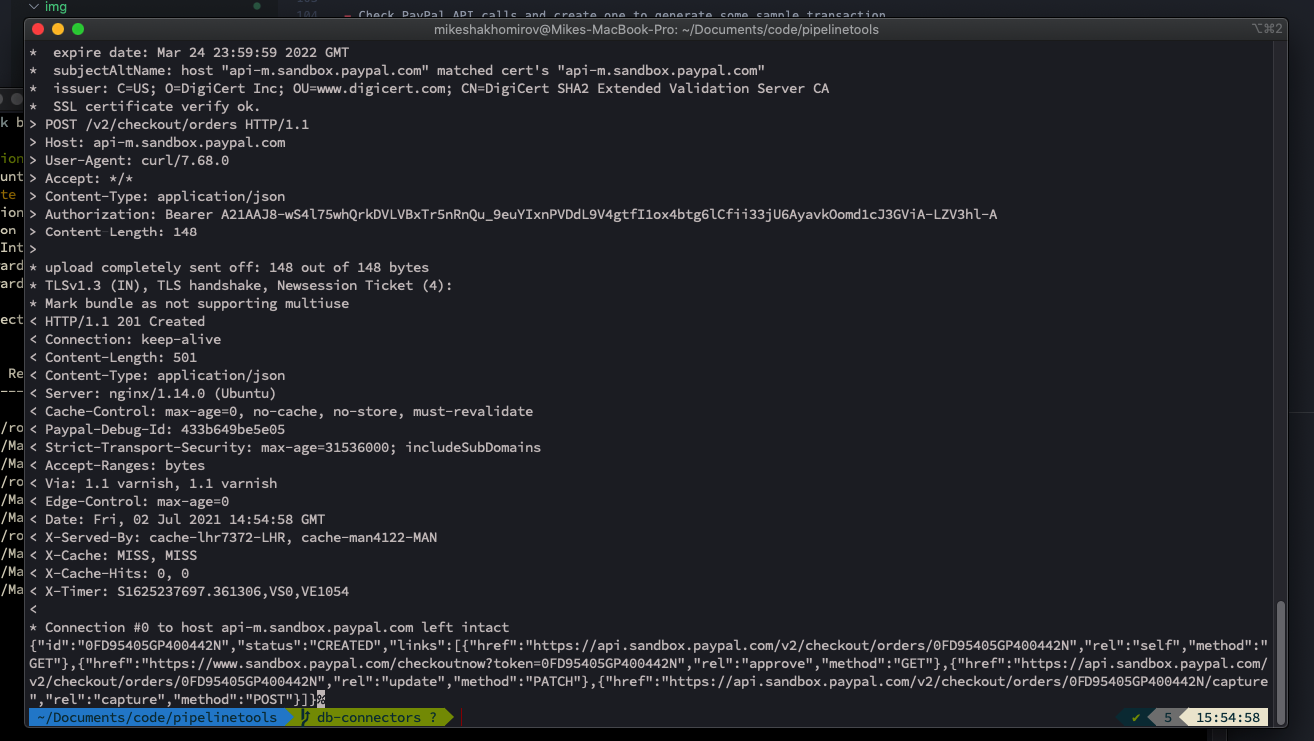
Image by author @mshakhomirov -
Customer now will accept and approve it:

Image by author @mshakhomirov IMPORTANT: To emulate Sandox customer you would want to create a test Personal account in your paypal.developer.portal. That would be different from your Test Business account. By doing so you will be able to virtually approve your orders. Go to https://developer.paypal.com/developer/accounts/ and create a Test Personal account. Then login and use it to approve the order.
Image by author @mshakhomirov 
Image by author @mshakhomirov - Once the Order approved you might want to UPDATE it. The CURL below Updates an order with the CREATED or APPROVED status. You cannot update an order with the COMPLETED status.
- Final step would be to capture the payment. Go to APEX or click capture or use CURL with previously approved order ID: IMPORTANT: Order MUST be approved by a customer in order to capture the payment and this is the most tricky part which normally requires some server development but you could simply use APEX to create a virtual buyer (using Personal Sandbox account) just to test it.
- Now you can check order details:
STEP1: Get historical transactions from PayPal using reporting API
When finally you have some completed transactions in your Sandbox you would want to use a Reporting API:
Output would be something like this:

This JSON response has all transactions within the selected date range you need. Next you would want to run this command programmatically ans save data to Cloud storage, for example, AWS S3. This is a "data lake" step which aims to store your data safely so you could examine or change it before loading into data warehouse. This of course would create a duplicate of your data in both Cloud Storage and data warehouse but I would recommend to do it this way so you could easily examine any data loading errors. Setting an expiration policy on a bucket would clean the Cloud storage after certain amount of days.
Step2: Create a serverless Node.js application with AWS Lambda to extract data from PayPal API

- You would want to use the following Node.js modules:
- axios to make HTTP requests to PayPal API
- moment to handle datetime data and parameters
- aws-sdk to save data to S3
- run-local-lambda to test your lambda locally
-
Initialise a new Node.js app so you have a
./package.jsonlike this: -
Your app directory would look like this:
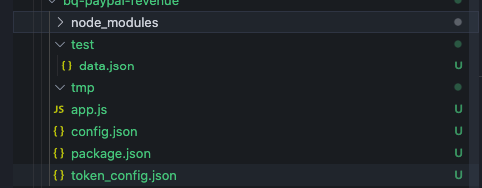
Image by author @mshakhomirov -
use
./config.jsonto separate your live and staging environments. For example: -
create a file to configure your PayPal access token credentials and replace "Basic *" with a Base64 encoded combination of client_id and
secret, i.e.: You can also copy and paste this Base64 encoded string from one of the previous CURL requests in the beginning of this tutorial where you got access_token.
You would want to pass your Base64 encoded string
clien_id:client_secretto Authorization header. If you use Postman, for example, you will find your client_id and client_secret values, appended to the text "Basic " in Headers as follows:"Authorization": "Basic QWNxd2xIYT.....Use it to get access token with OAuth2.0 and then use in your PayPal API calls. Read more about it here . -
Now create a file called
app.js: -
Now you you would want to create a function called
processEventto process an event that will trigger the function to extract transaction data from PayPal. -
FINAL SOLUTION:
-
PayPal will paginate the output if transaction request size is too big. So
processEventwill valuate size first and then extract data page by page from PayPal API. - To test and run locally on your machine use:
npm ithen Use commandnpm run test. -
Use a
./deploy.shto deploy your Lambda in AWS. - When Lambda deployed to AWS and is being executed, for example, by Cloudwatch event trigger. AWS Cloudwatch event will trigger Lambda daily using a schedule.
- Lambda will get PayPal credentials from ./token_config.json and authenticate with PayPal
- Looping through each PayPal report needed (tables in ./config.json) Lambda will save each batch of transactions into AWS S3 in JSON format.
- This will source data for a table in your data warehouse, i.e. if you call the file the same name as your data warehouse table it could be programmatically loaded into relevant table. So another microservice could pick it up from there (not covered in this project)
- You can invoke lambda manually when it is deployed by running this script (AWS CLI required):
app.js -
PayPal will paginate the output if transaction request size is too big. So
Project conclusions
The traditional ETL, which stands for Extraction, Transformation, and Loading, has now evolved onto ELT. Data is Extracted from source systems, Loaded into the data warehouse and then Transformed within the data warehouse. This live project helps you manage that "E" part, the extraction from external data sources.
- Whether you’re a startup or a global enterprise, you've learned how to use serverless to extract data from arbitrary party data sources.
- You've learned the concepts of datalake, datawarehouse and decoupled data storage.
- You've learned how to use AWS Lambda functions to create a simple and reliable data extraction pipeline.
- All these above provide an idea or a template which could be easily extended and reused for any other arbitrary data source you might require in the future.


 © Mike Shakhomirov
Comments
Jen Lopez November 13, 2021
Very useful.