Building a static blog website. Part 1: Domain name. S3. SSL, HTTPS and Cloudfront.
This is a Part 1 of building a static website with back-end features project. There is a plenty of articles on how to create custom websites but not too many cover full project lifecycle from buying a domain, setting up HTTPS , uploading into the cloud to back-end and SEO optimisation. This article is exactly about it.
If you are in the beginning of your dev career and just learning things this article should be perfect for you. In this tutorial we will buy a domain name, use a vanilla (plain HTML, CSS and JS) template, deploy it in the cloud, set up SSL connection to your website, build a forms engine with lambdas, set up commenting system (so it it's like a blog 🙈 lol) and do some SEO optimization.
Project layout:
You are here >>> Part 1: Domain name. S3. SSL, HTTPS and Cloudfront.
Part 2: Basic back-end. AWS API Gateway and Lambda functions.
Part 3: Commenting system with AWS lambda and Dynamo DB.
Part 4: SEO optimization.
Usefull links:
- AWS account. If you don't have it just create it now. It's Free!. How to create AWS account
- Neuron templatelink..
Download the template now. It's Free!
Prerequisites:
- AWS account.
- AWS cli. you will need python distribution. Follow this article to create one if you don't have it yet.
If you don't have any of these then create it. It's Free!
Let's buy our domain now.
Building things with AWS is super easy. We will use S3 to host our HTML template we downloaded from useful links above.
Let's save it somewhere, I'll use C:\code\mydataschool-website> .
So we are going to use this template and create a personal blog with contact form and commenting system in pure HTML. But first lets upload it to S3 and make it available to the world with https. It's pretty much a standard these days 🙈
Go to AWS console --> Route53 --> Registered domains:
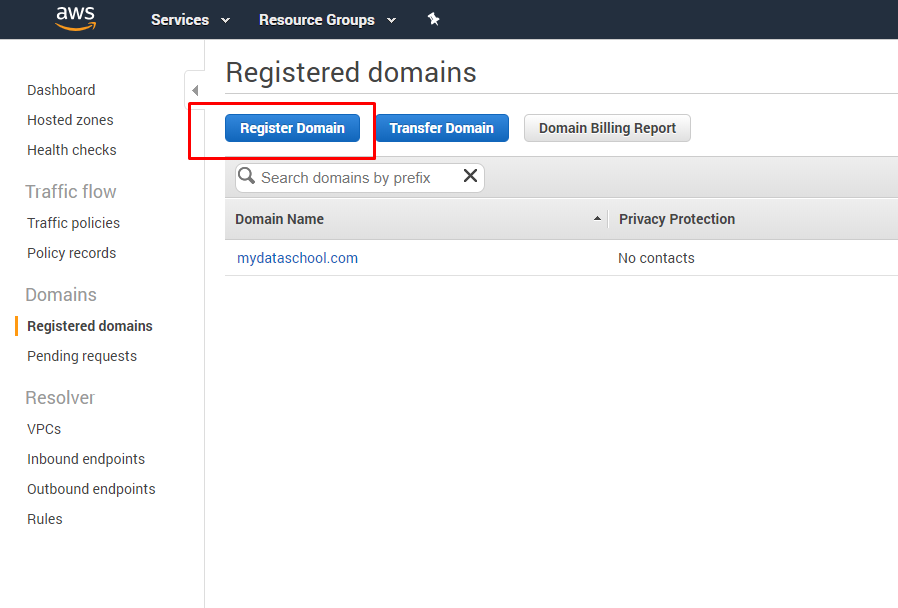
And click Register a domain button. Then select any name you like and buy it. Prices are very average and I couldn't find cheaper anywhere else plus it's just convenient. In a few minutes after the payment you will have your own domain name.
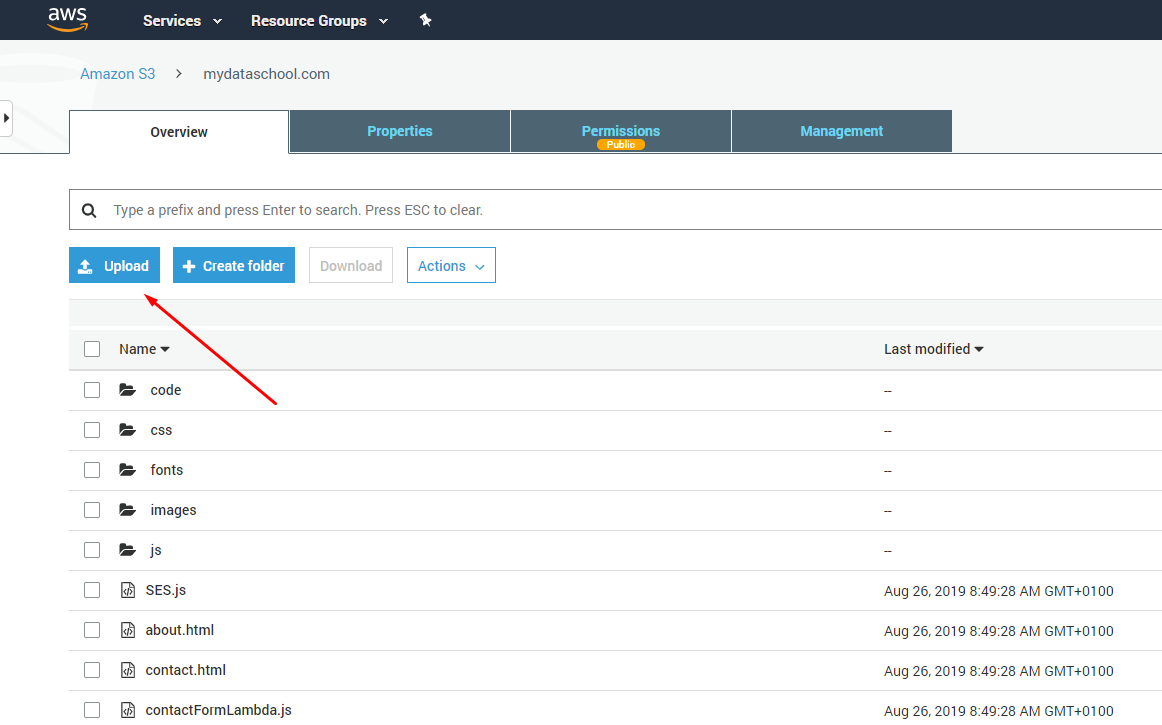
Now let's go to S3 and create a bucket where we will host our website. Services --> S3 --> Create bucket --> call it mydataschool.com (or change it to whatever your domain name is).
Click upload and upload your template.
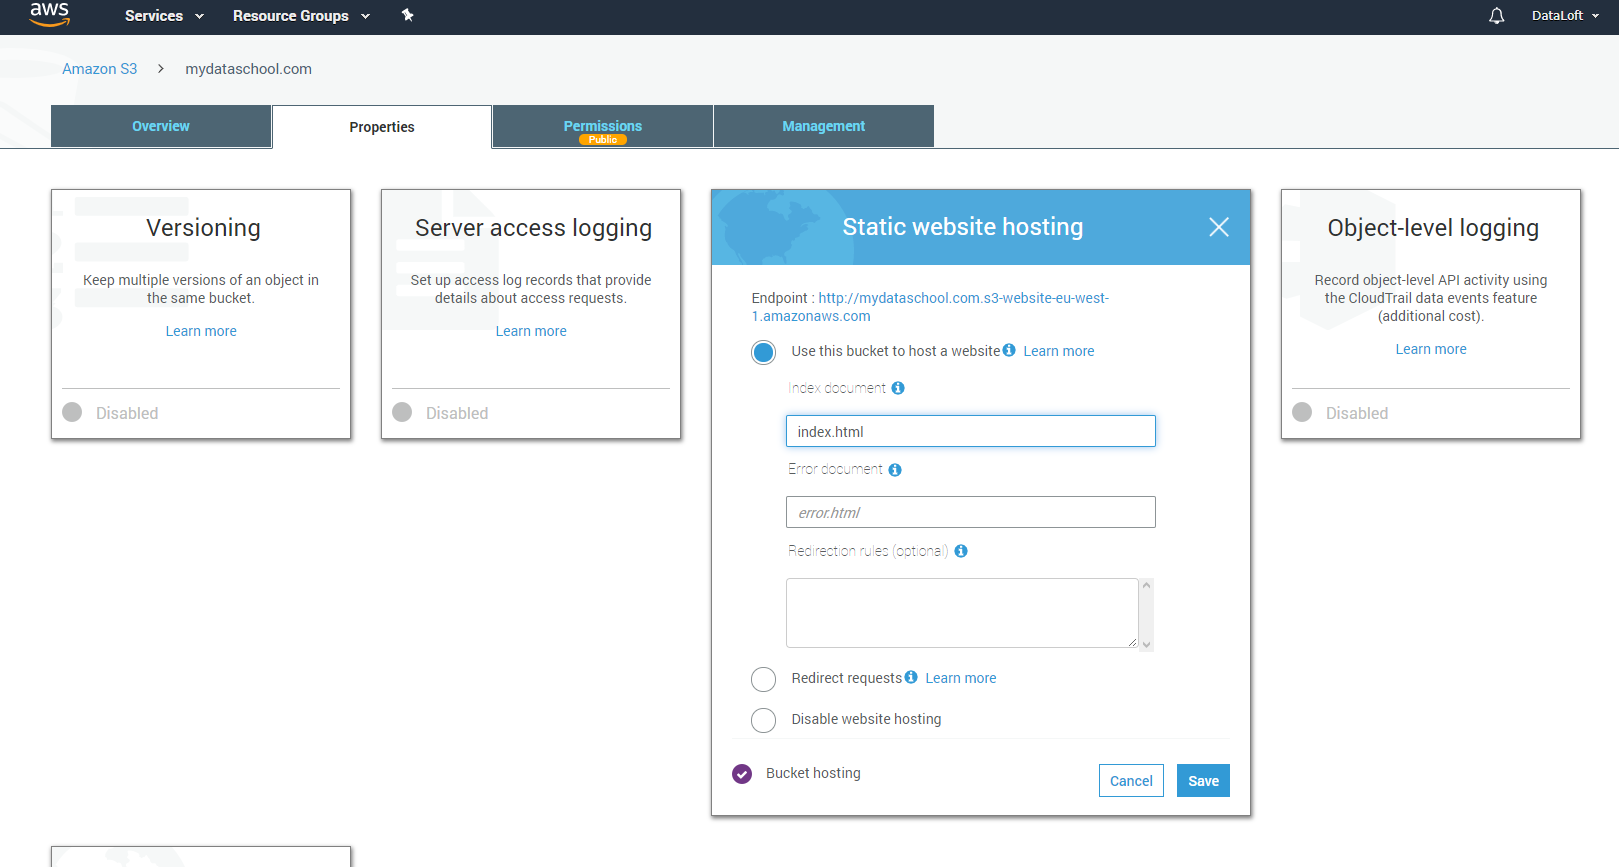
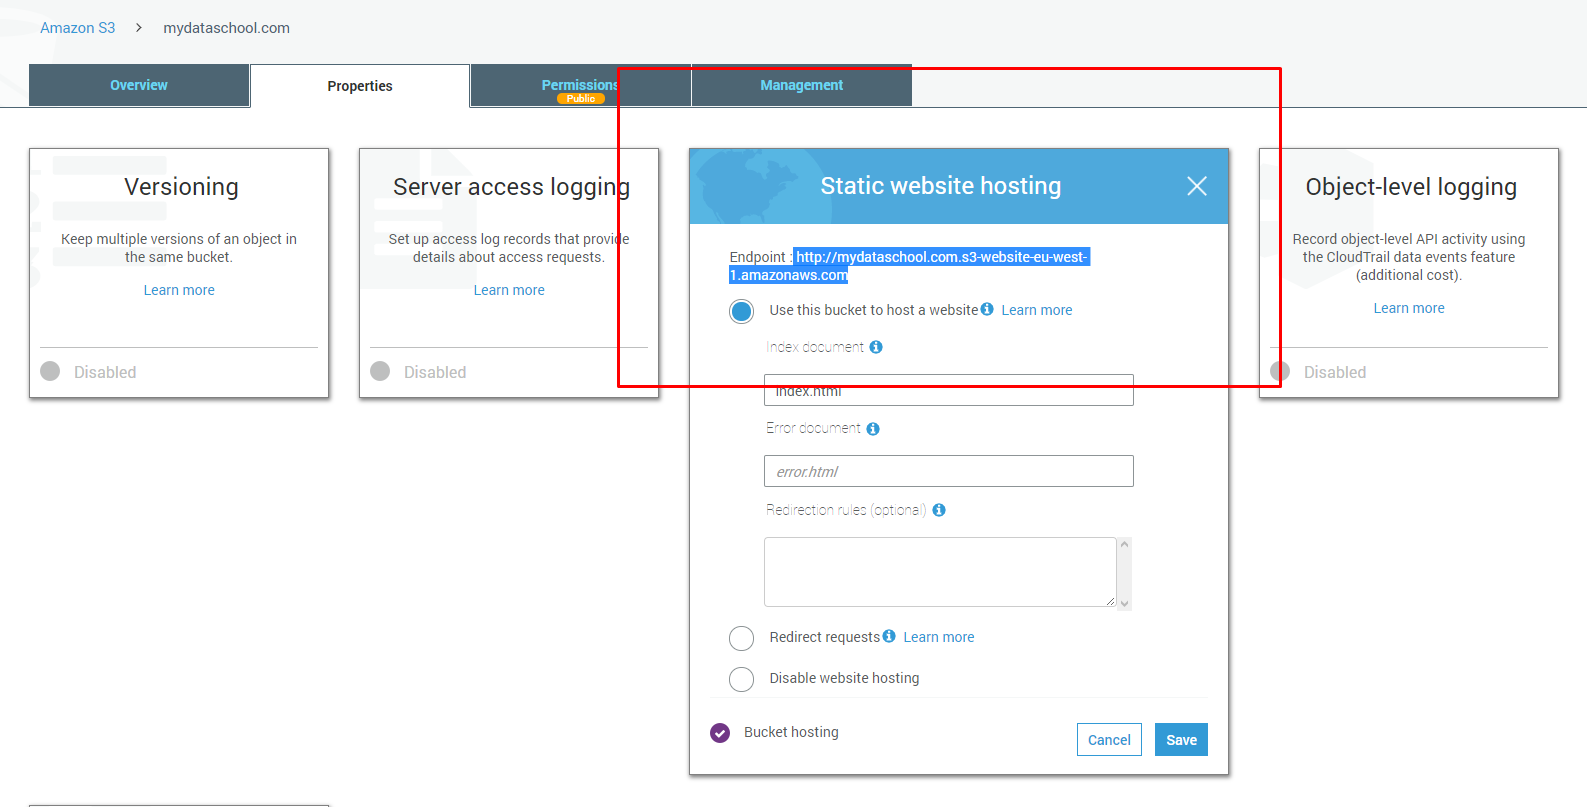
Then go to bucket properties Static website hosting --> enter https://mydataschool.com in there.
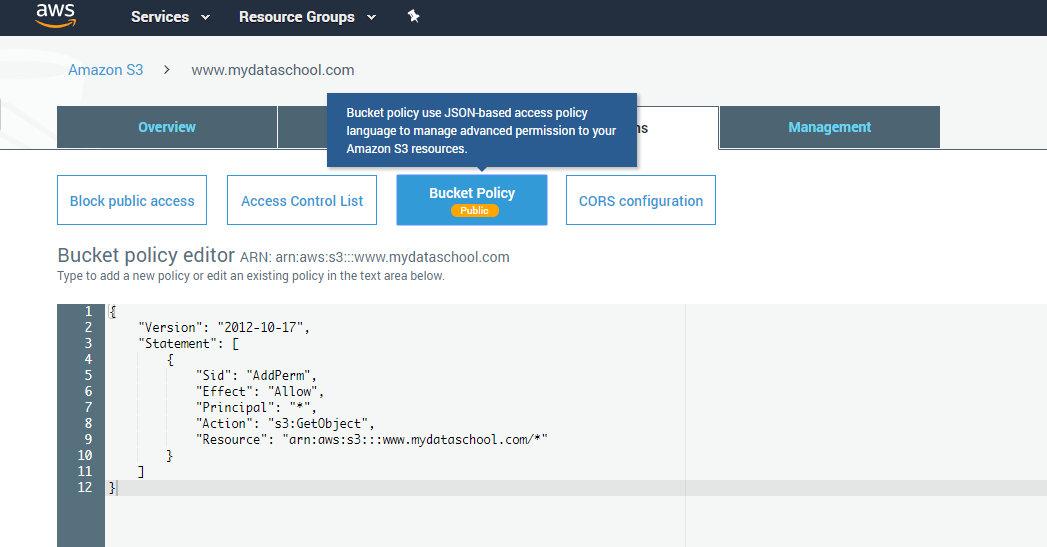
Then go to bucket Permissions --> enter the following JSON there (replace mydataschool.com to your bucket name).
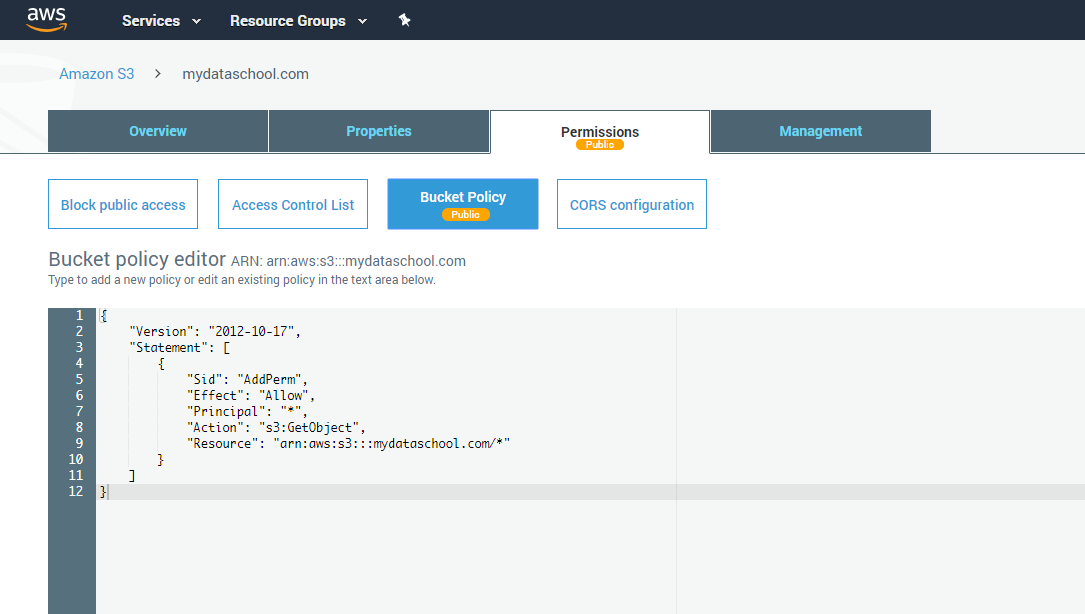
{
"Version": "2012-10-17",
"Statement": [
     {
          "Sid": "AddPerm",
          "Effect": "Allow",
          "Principal": "*",
          "Action": "s3:GetObject",
          "Resource": "arn:aws:s3:::mydataschool.com/*"
     }
]
}
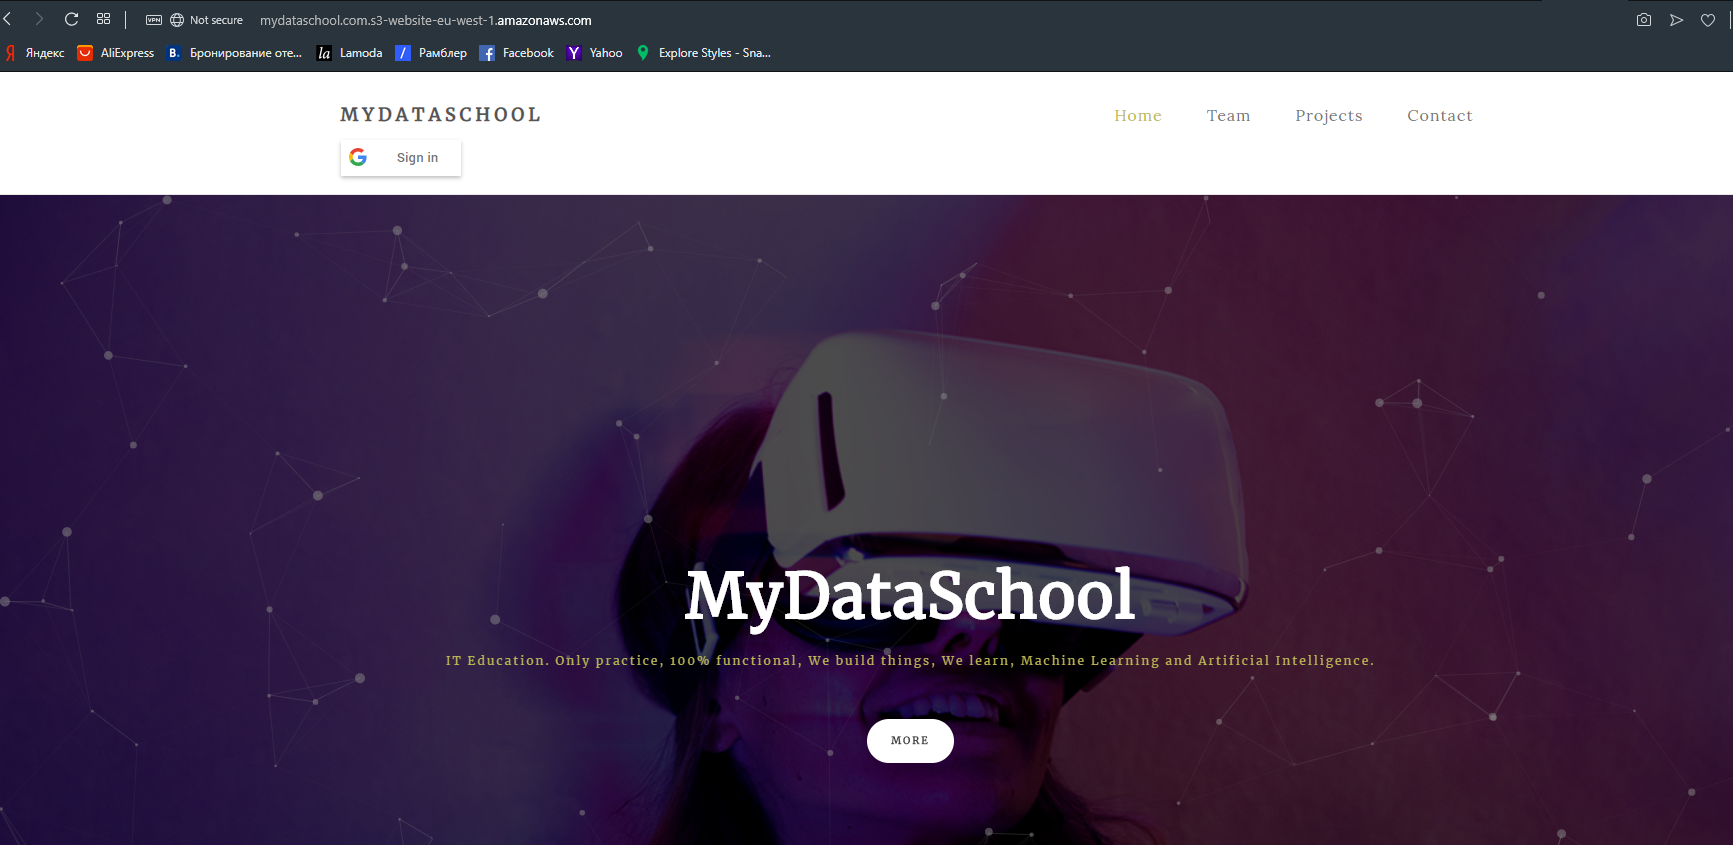
This is it! Your website is live and opened to the World! Go to bucket Properties --> Static hosting and use endpoint in your browser. If everything OK you will see your website.
Let's get SSl sertificate for the website.
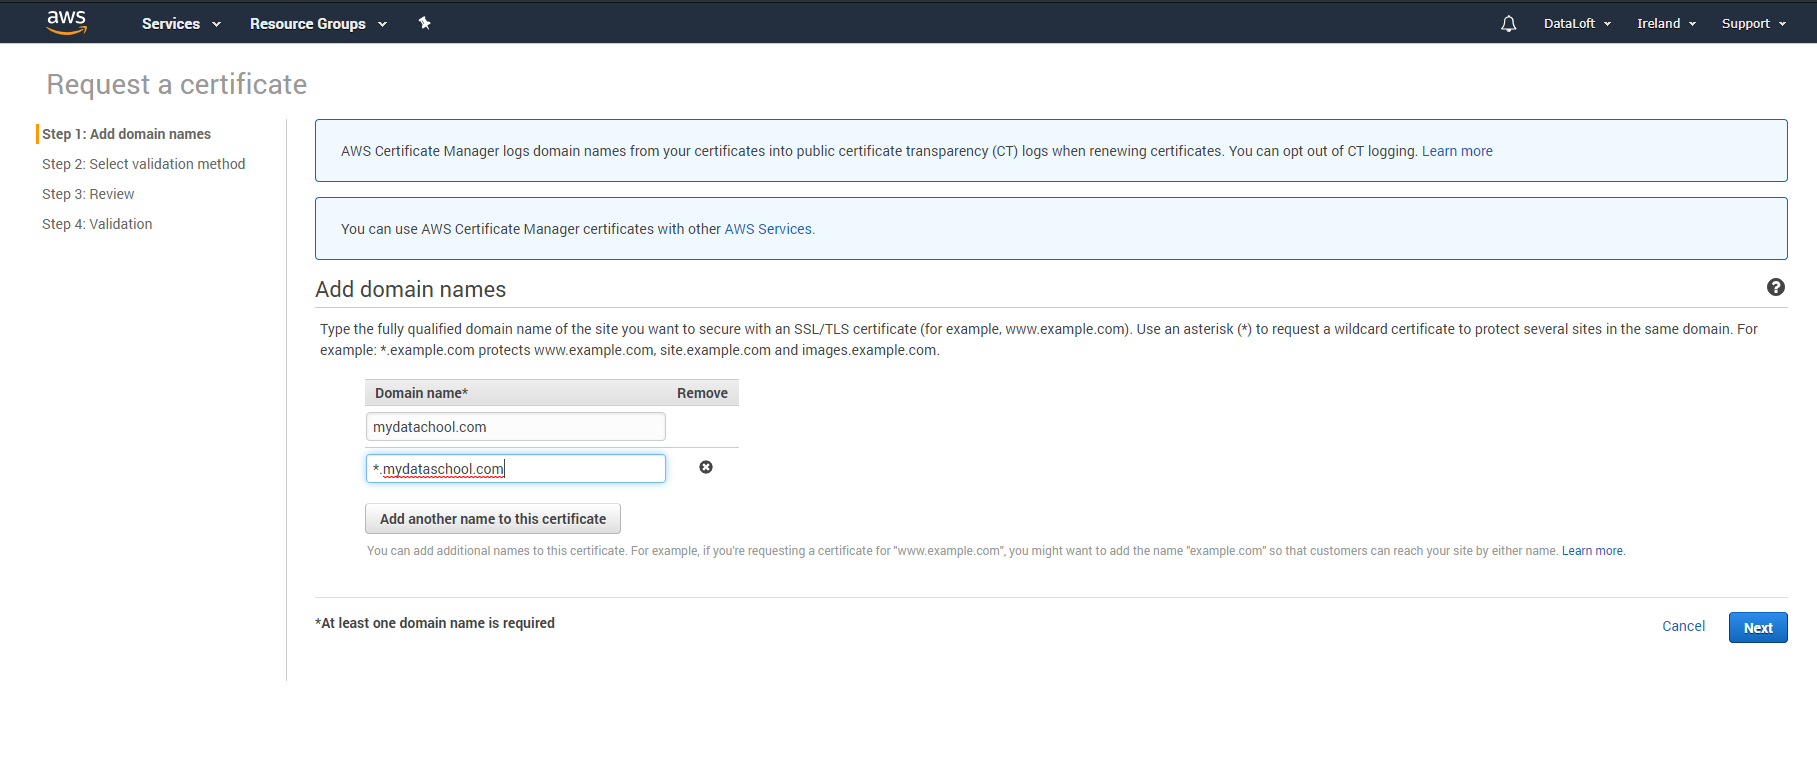
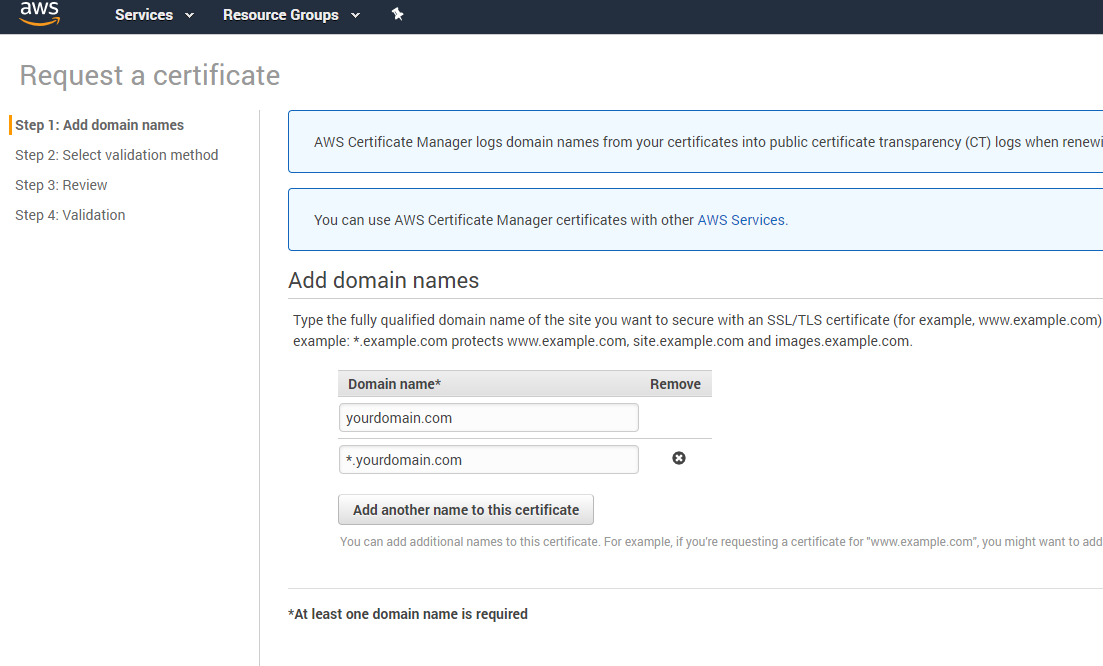
Go to Services --> Certificate manager --> Request certificate --> Public certificate --> Add domain names: *.mydataschool.com, mydataschool.com
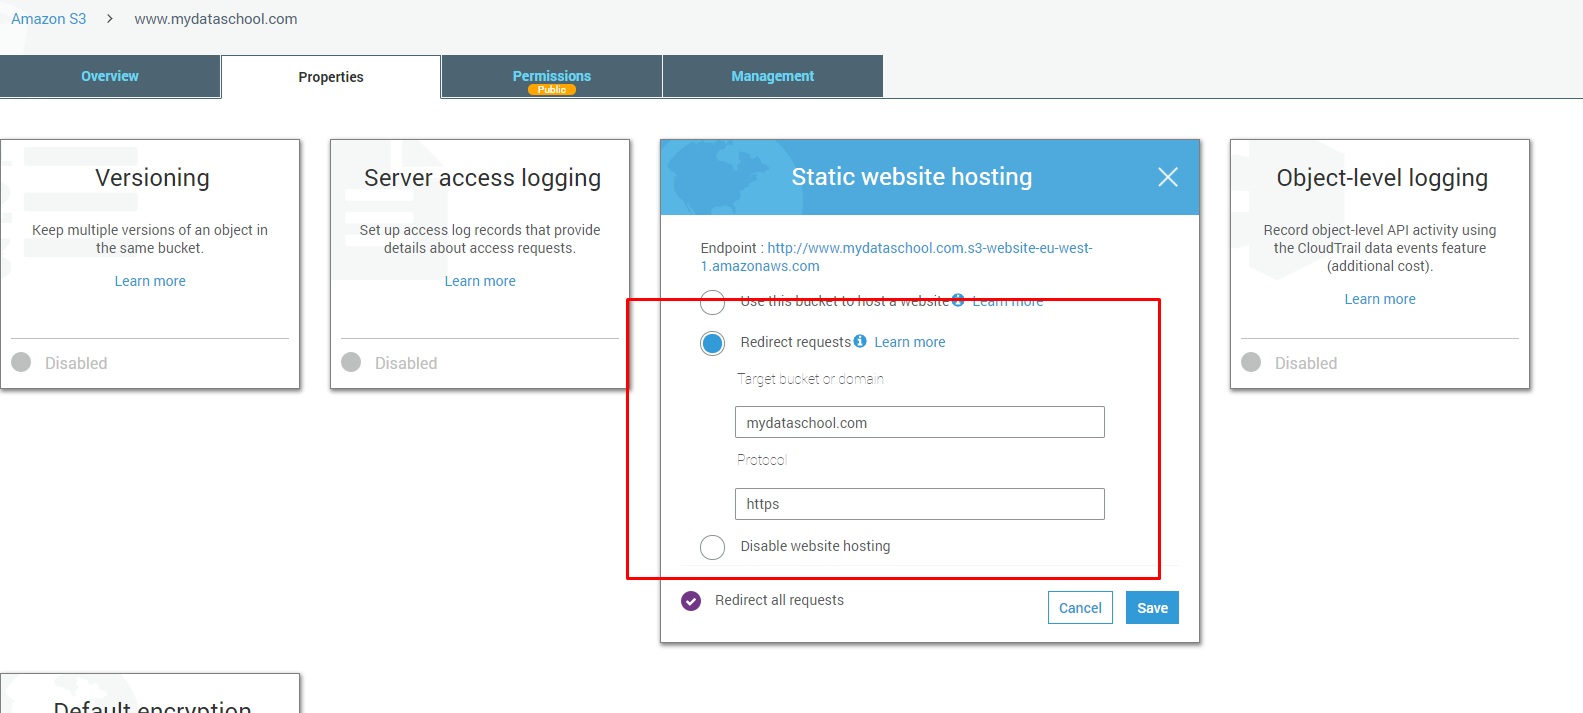
We need *.mydataschool.com because we will use it for www.mydataschool.com and you can set up a bunch of subdomains if you want. let go to S3 --> Create bucket www.mydataschool.com (replace with yours) --> Properties --> Static website hosting --> Redirect:
Use the same bucket policy as for mydataschool.com, just add www.
Now if anyone goes to www.mydataschool.com they will be redirected to your website.
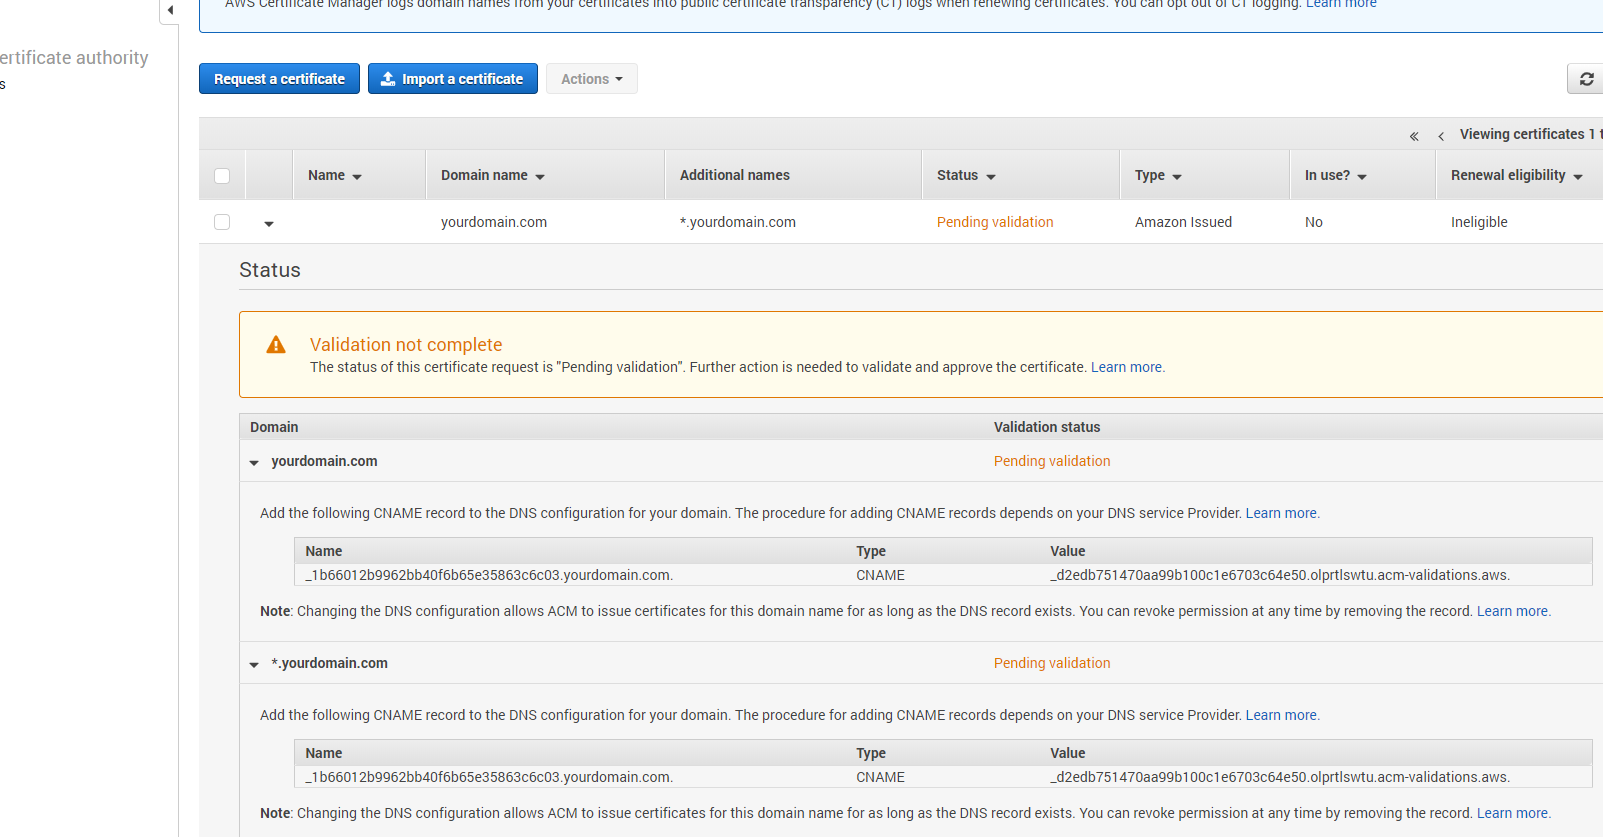
Let's go back tp certificate manager. Make sure it is in the US East (N. Virginia) Region and request certificates for both *.mydataschool.com, mydataschool.com.
Select DNS validation --> Add route53 CNAME records. This will add SSl certificate to your domain. Usually it takes 5 minutes to validate your domain.
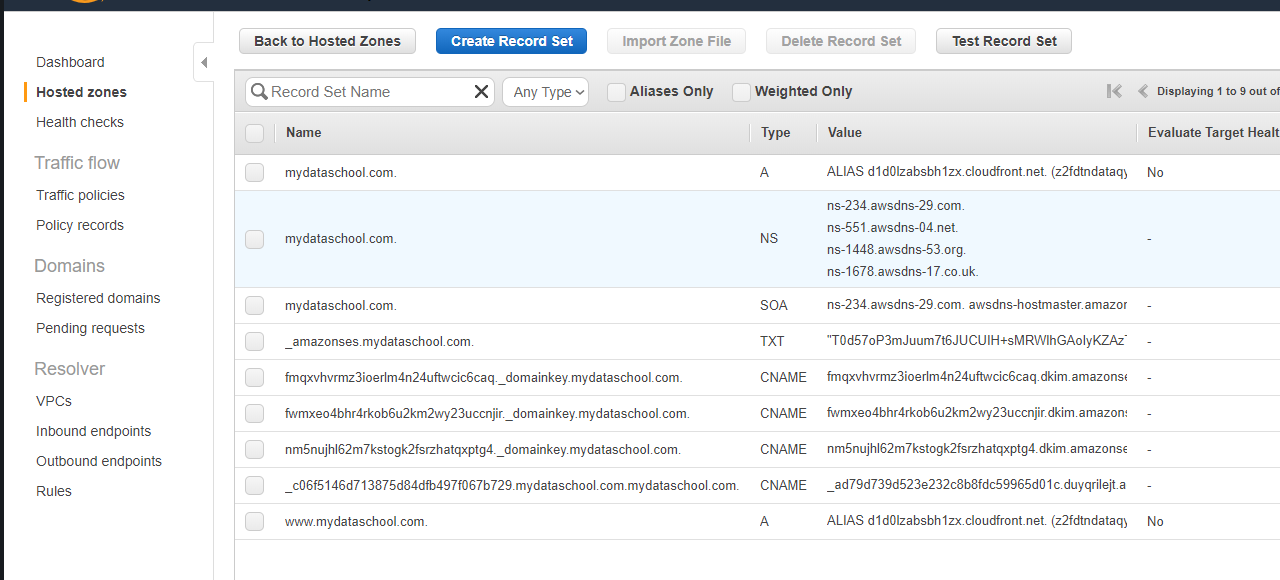
Go to Route53 --> Hosted zones and you will see something like this below. It will ne less but similar
Let's use our domain name instead of bucket endpoint. Go to Cloudfront. HTTPS.
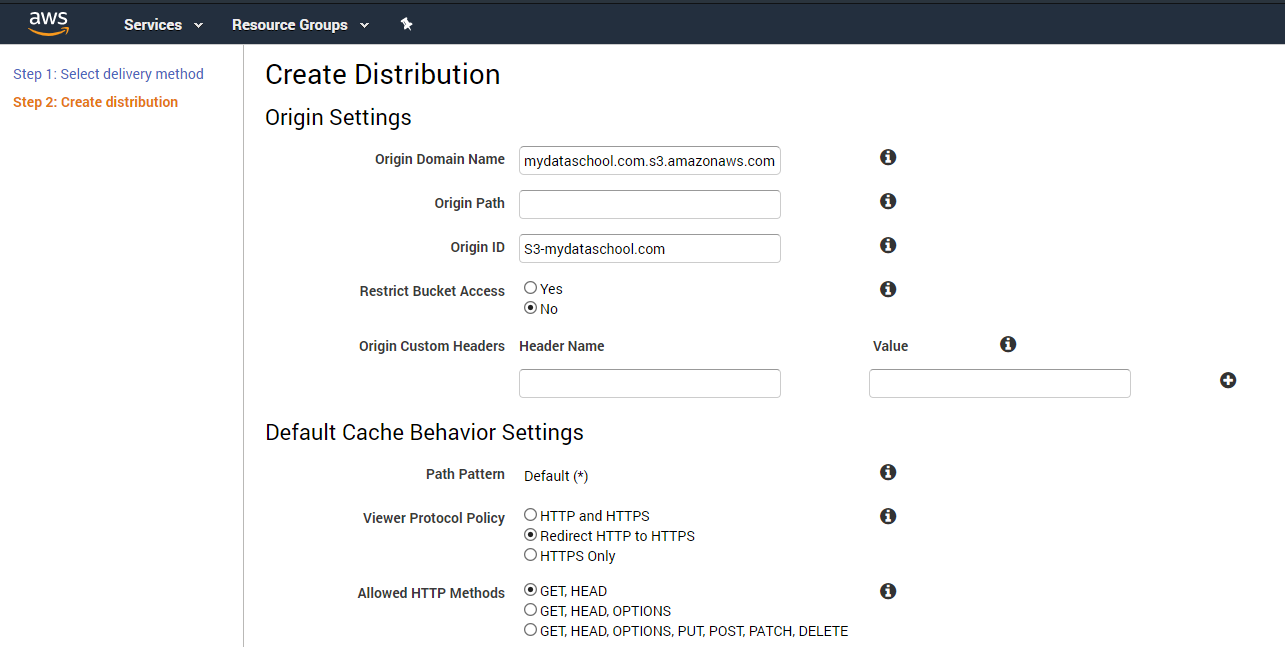
Let's go to Services --> Cloudfront --> Create distribution --> Web. This will enable https secure connection for your website.
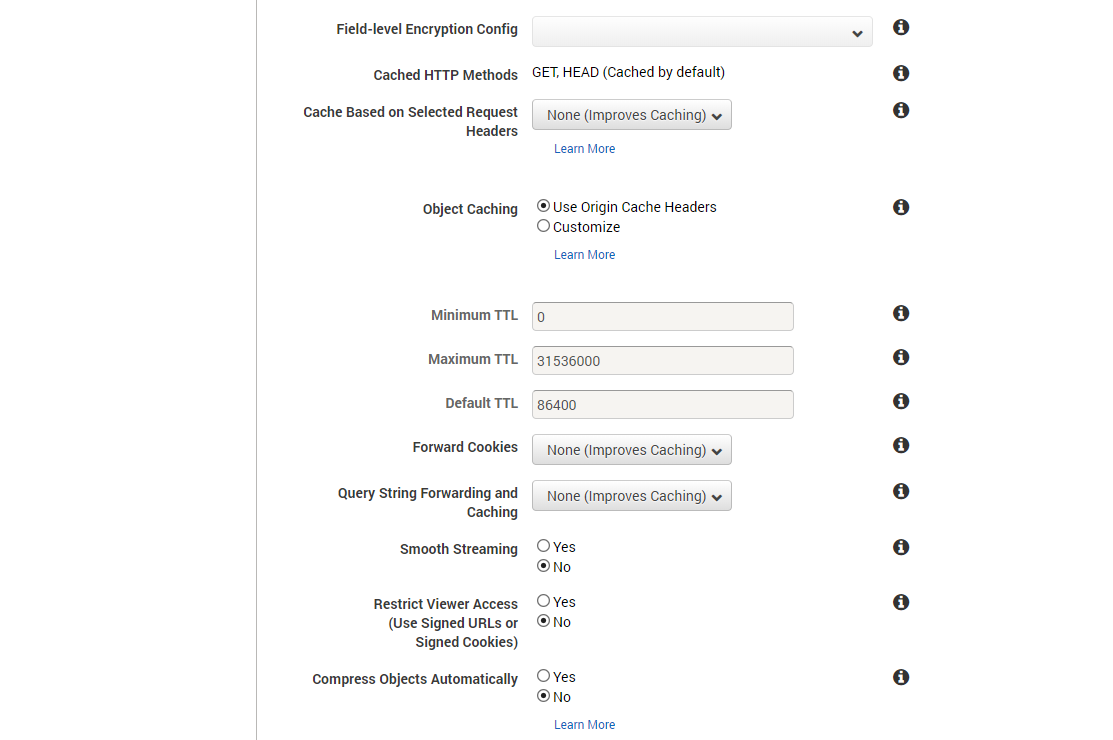
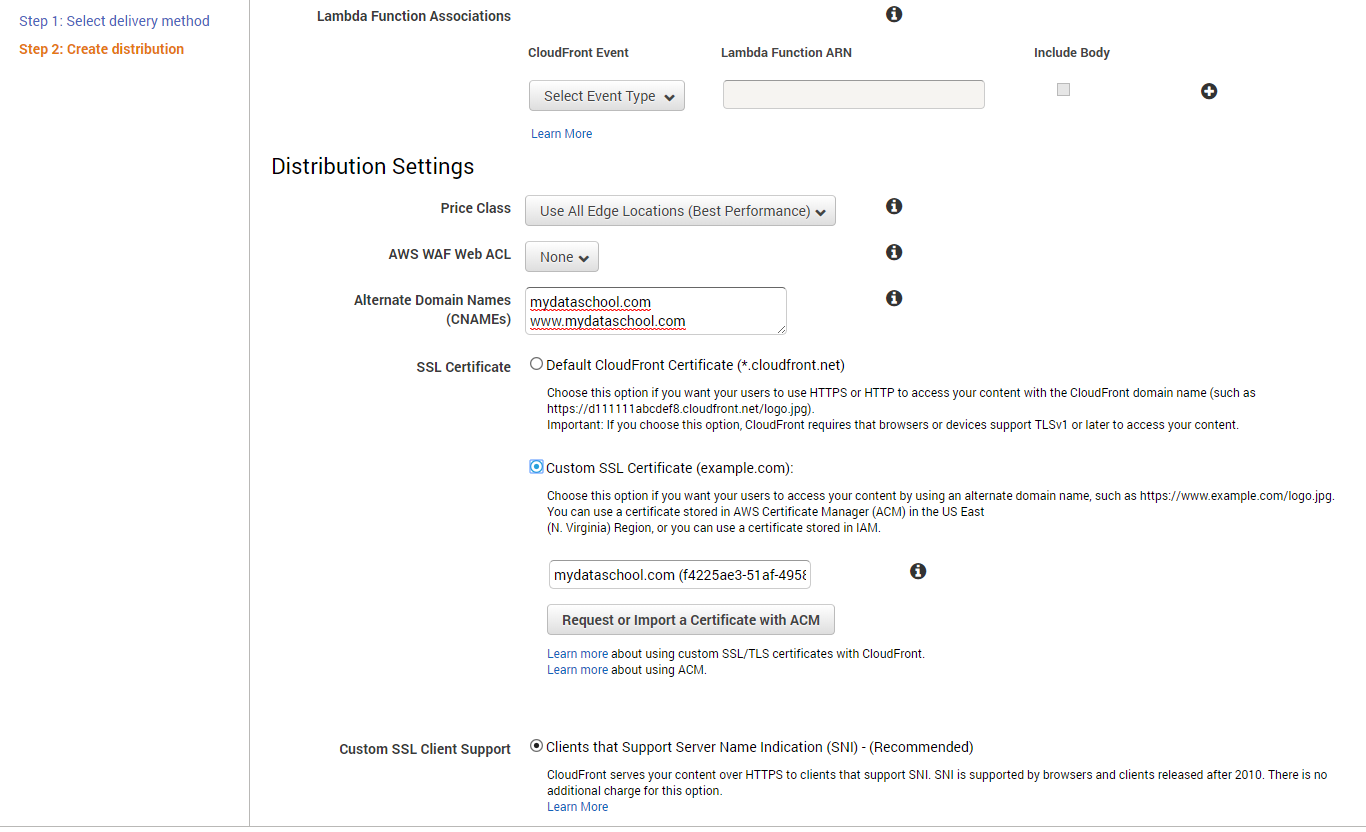
We need two new web distributions, one for each S3 bucket. Head to CloudFront in the AWS Console and create the first web distribution. There are lots of settings available to create a web distribution, but for the basics we only need to change five:
The distributions can take a while to spin up, so while we wait, let’s do the finishing steps.
Back in S3, go to your secondary bucket (www.mywebsite.com), in the Properties tab and under Static Website Hosting set the redirect protocol to HTTPS.
Finally, head back to Route53. We need to update the custom A records we created to now target the CloudFront distributions rather than the S3 buckets. For each record, change the Alias Target and select the CloudFront distribution available in the dropdown.
Note: Again, if you are using another DNS service you’ll need to go update the CNAME record from there to point to the CloudFront domain name.


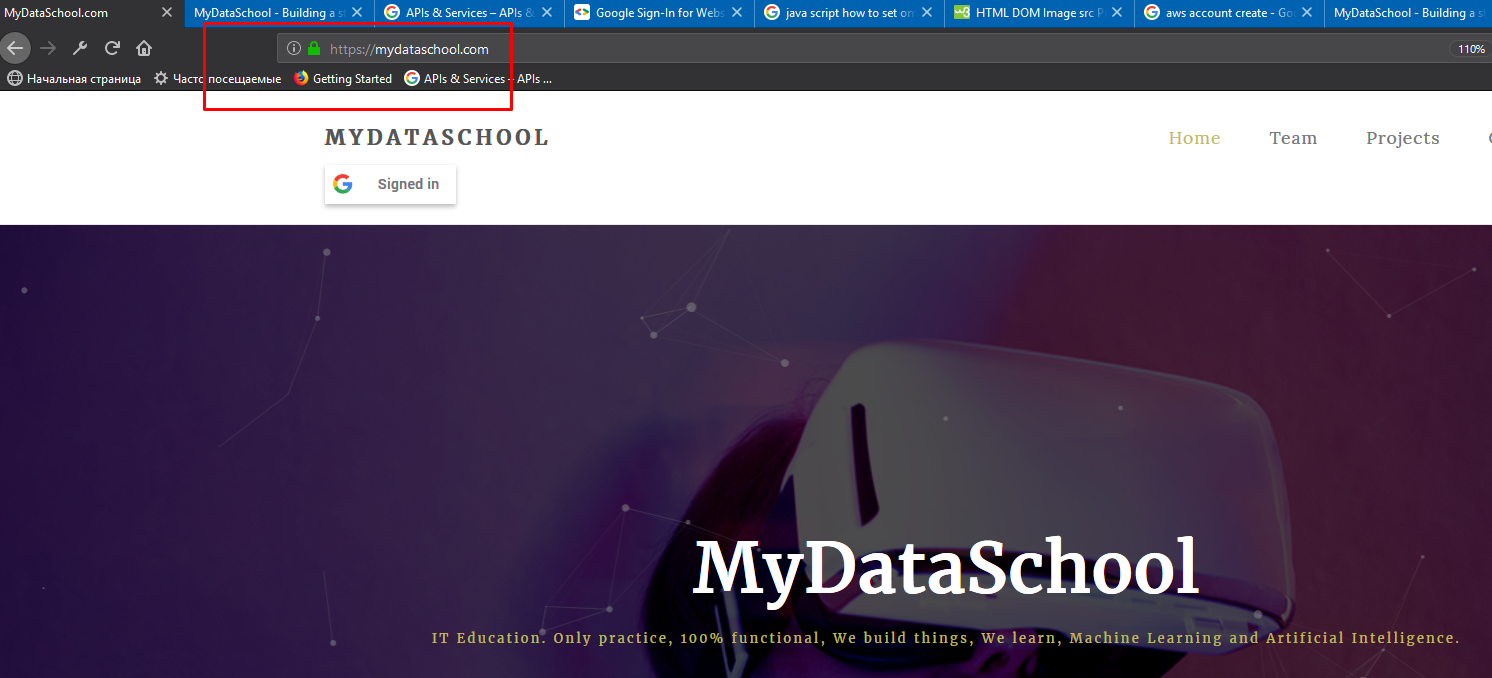
That's it! It should enable your secure SSL connection to a website. Go to https://www.yourwebsite.com :
We covered such topics as as https and Cloudfront configuration and deployed our website in AWS S3. In Part 2 we will build a basic back-end with contact form and make our website more dynamic.

Thanks for reading!

Mike
Mike is a Machine Learning Engineer / Python / Java Script Full stack dev / Middle shelf tequila connoisseur and accomplished napper. Stay tuned, read me on Medium https://medium.com/@mshakhomirov/membership and receive my unique content.
Comments
David Jones
3 days agoAliquam gravida arcu at risus blandit, in interdum metus varius. Cras efficitur, ex sit amet tincidunt rhoncus, dui ex hendrerit risus, ac dapibus ligula mi id leo. In auctor dui justo, ac consequat dui posuere ac.