Building a static website with forms and blog. Part 2. Lambda contact form.
This is a Part 1 of building a static website with back-end features project. There is plenty of articles on how to build websites but not too many cover full project lifecycle from buying a domain, setting up HTTPS , uploading into the cloud to back-end and SEO optimisation. This article is exactly about it. In this tutorial we will buy your own domain, deploy it in the cloud, set up SSL connection to your website, build a forms engine with lambdas, set up comments system and do some SEO optimization.
Project layout:
Part 1: Domain name. S3. SSL, HTTPS and Cloudfront.
You are here >>> Part 2: Basic back-end. AWS API Gateway and Lambda functions.
Part 3: Commenting system with AWS lambda and Dynamo DB.
Part 4: SEO optimization.
Usefull links:
Prerequisites:
- AWS account. Follow this article to create one if you don't have it yet.
- AWS cli. you will need python distribution. Follow this article to create one if you don't have it yet.
If you don't have any of these then create it. It's Free!
Let's create our contact form with AWS Lambda.
./https://mydataschool.com/contact.html
This is how our form looks like:
In a few words it is responsible for sending the contact data to our AWS account. Let's create a Lambda function to process it and notify us when someone submits something on a website.
Lambda function.
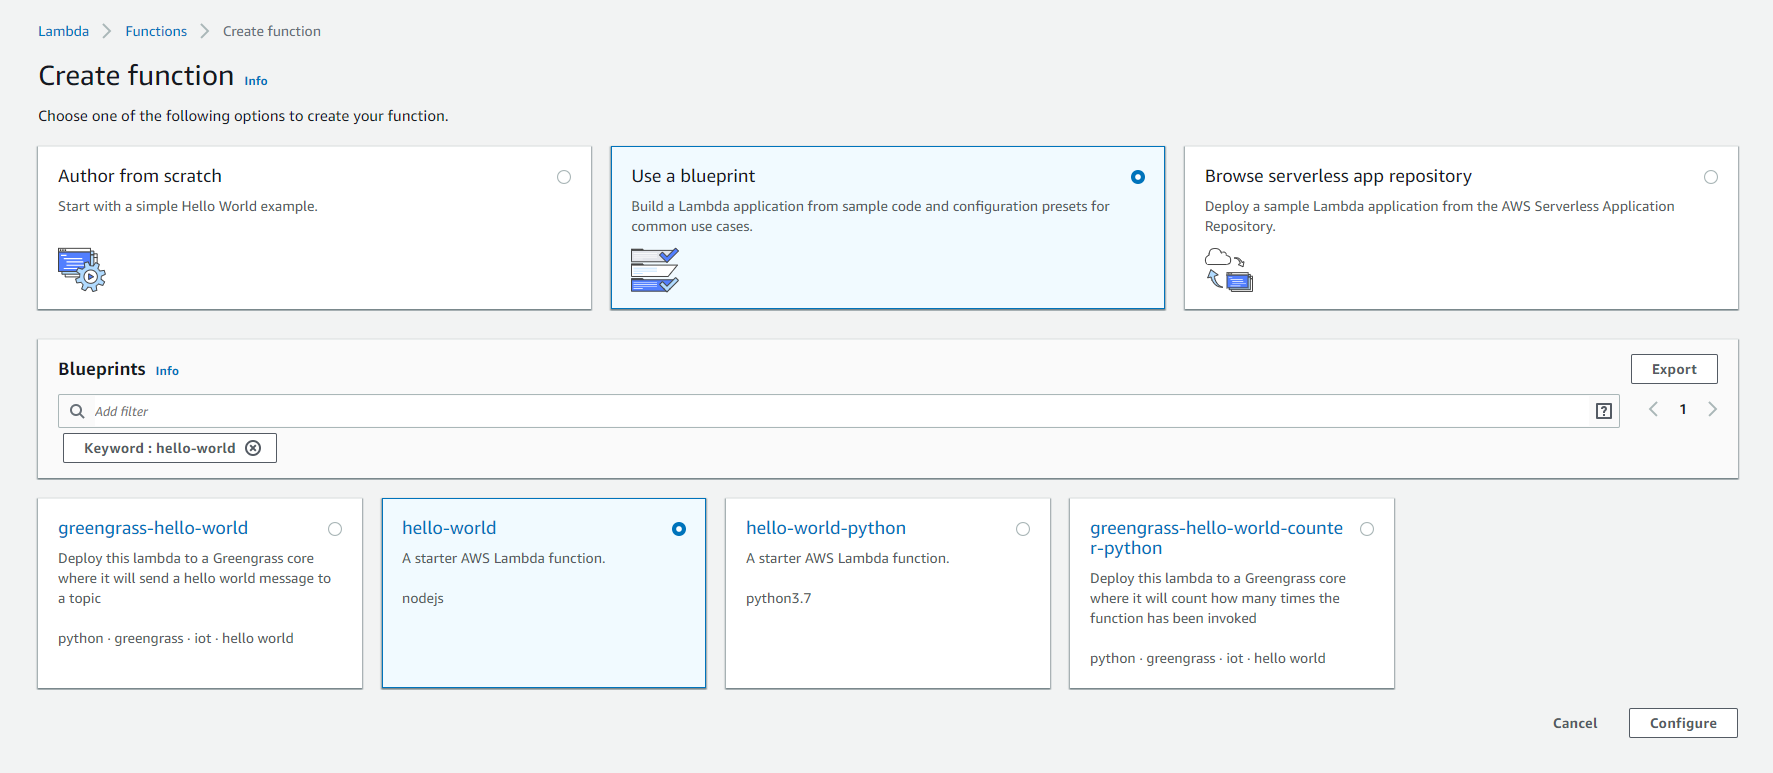
Go to the console and click on “Create Function” and select blueprints for hello-world nodejs as shown in below screenshot and click on configure button at the bottom.
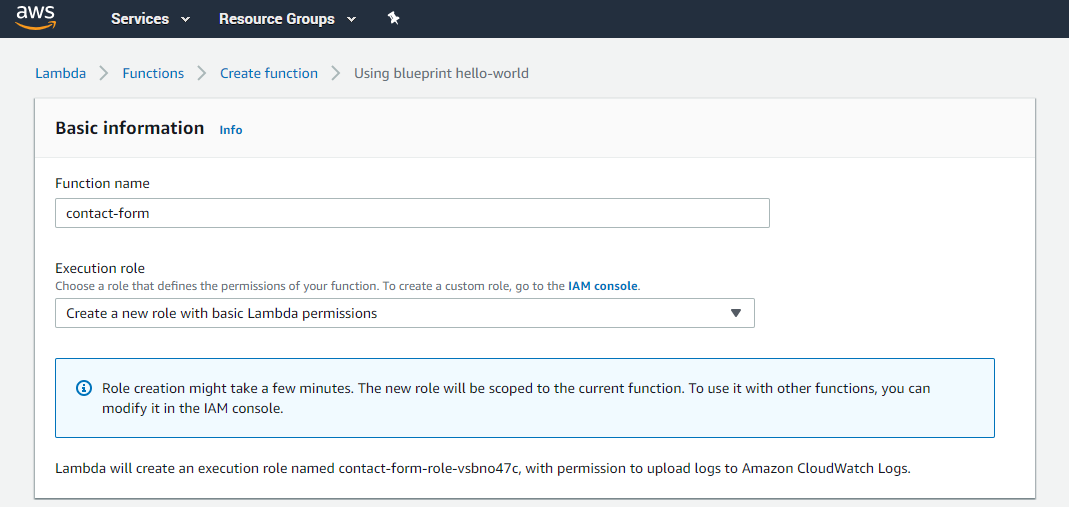
To create your AWS Lambda function, select the “edit code inline” setting. Click Configure. And now select to create a new role for lambda. Then click create function.
Replace that code in index.js (making sure to change contactus@example.com to your real e-mail address and update your actual domain in the response variable) to this one:
var AWS = require('aws-sdk');
var ses = new AWS.SES();
var RECEIVER = 'your_email@gmail.com';
var SENDER = 'your_email@gmail.com';
var response = {
"isBase64Encoded": false,
"headers": { 'Content-Type': 'application/json', 'Access-Control-Allow-Origin': '*'},
"statusCode": 200,
"body": "{\"result\": \"Success.\"}",
};
exports.handler = function (event, context) {
console.log('Received event:', event);
sendEmail(event, function (err, data) {
context.done(err, response);
});
};
function sendEmail (event, done) {
var params = {
Destination: {
ToAddresses: [
RECEIVER
]
},
Message: {
Body: {
Text: {
Data: 'name: ' + event.name + '\nemail: ' + event.email + '\subject: ' + event.subject + '\message: ' + event.message,
Charset: 'UTF-8'
}
},
Subject: {
Data: 'Website Referral Form: ' + event.name,
Charset: 'UTF-8'
}
},
Source: SENDER
};
ses.sendEmail(params, done);
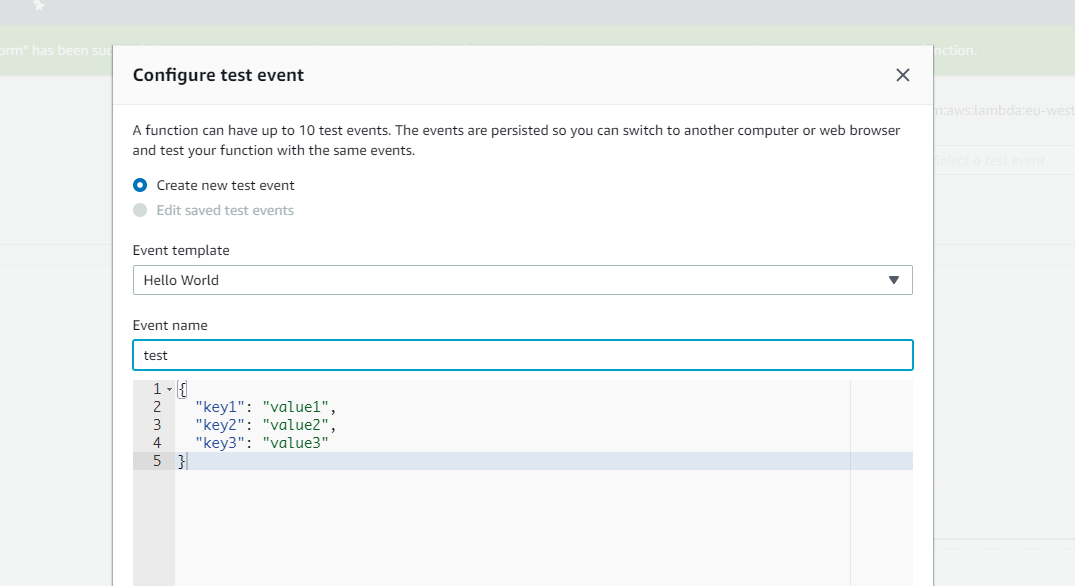
}Click save. Now you can execute and test your AWS lambda function. Create a test event:
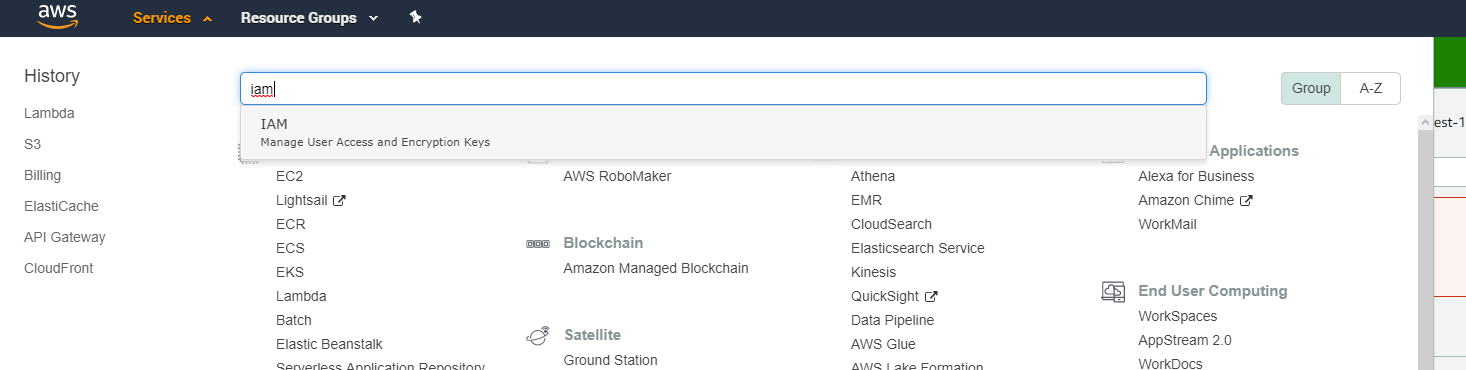
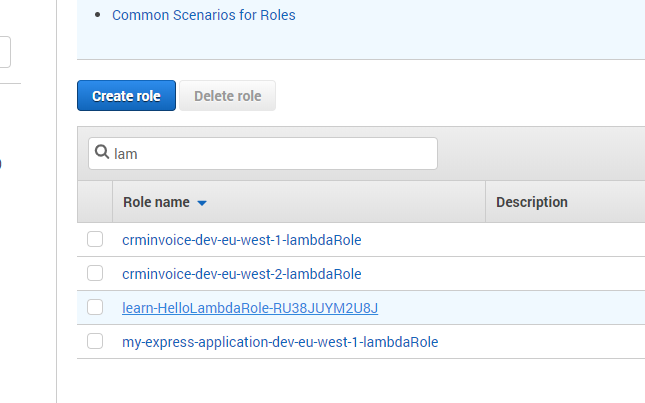
Click test and execute lambda. Ooopsy! Something went wrong. When something goes wrong in AWS it is most likely permissions. Click Services --> IAM:
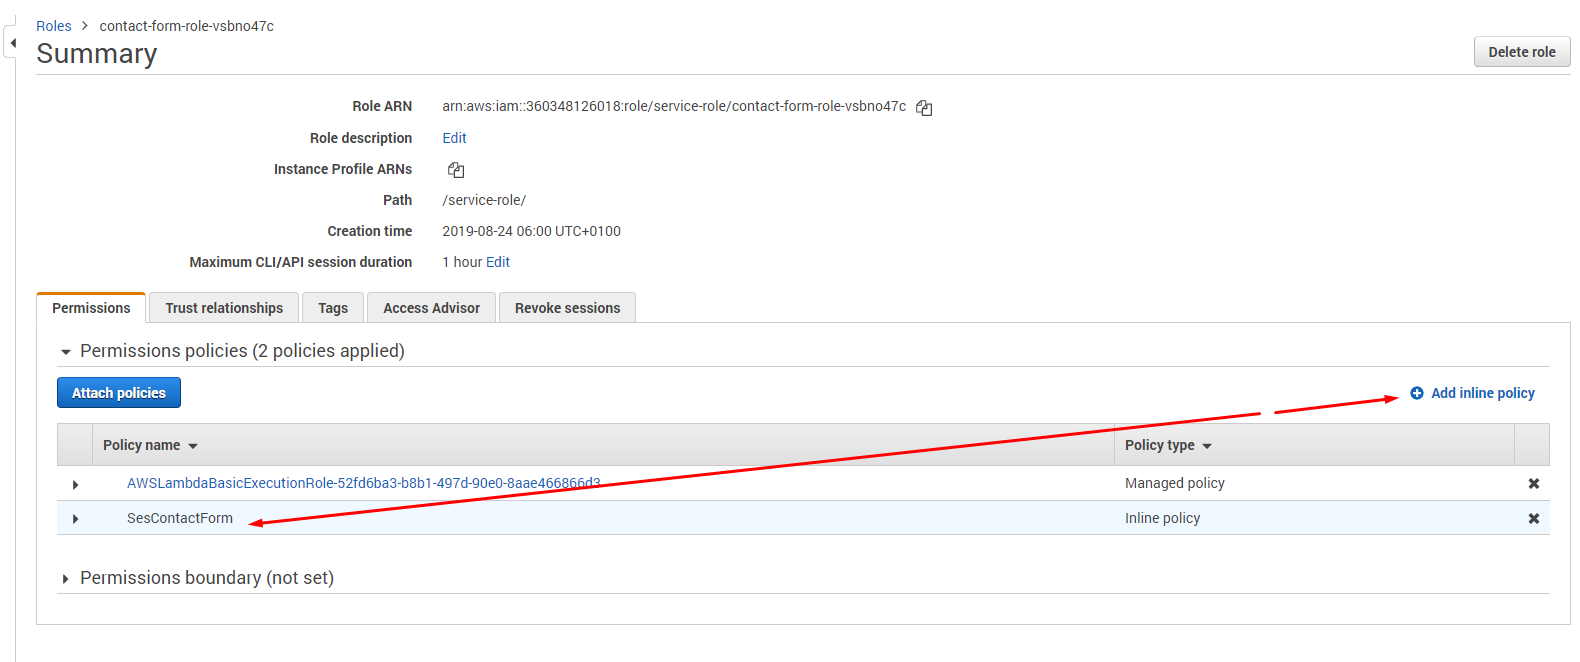
find your role which was created for your new Lambda:
Click Add inline policy. Add following code under policy to allow Amazon SES access to AWS lambda function:
{
"Version": "2012-10-17",
"Statement": [
{
"Sid": "VisualEditor0",
"Effect": "Allow",
"Action": "ses:SendEmail",
"Resource": "*"
}
]
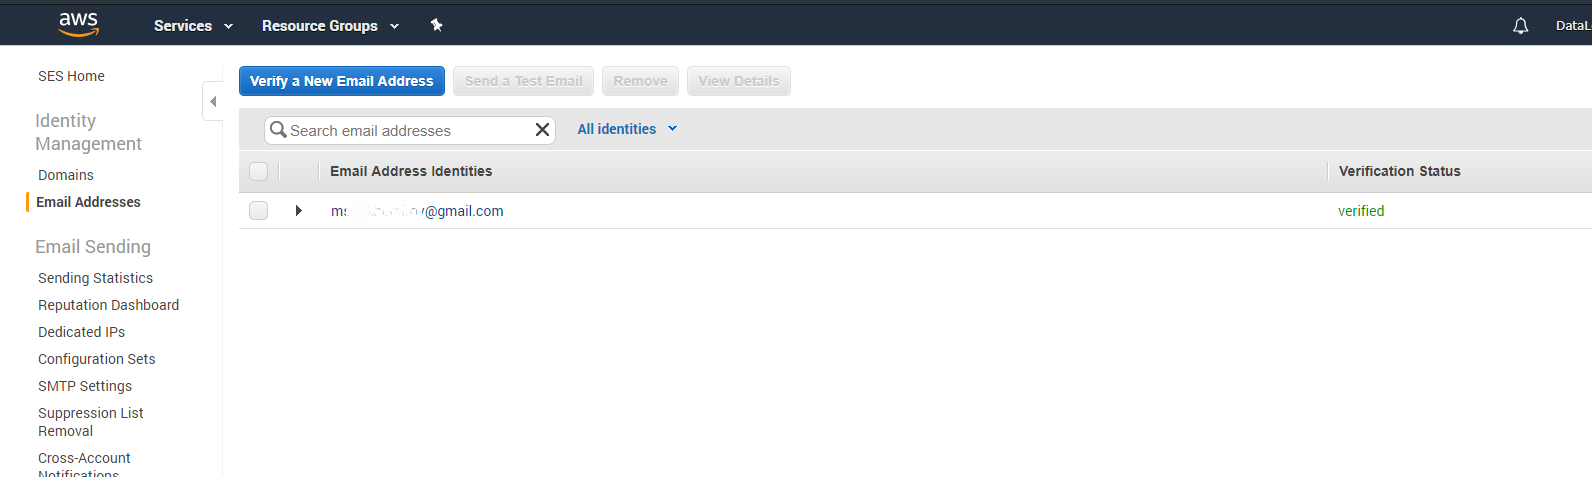
}Click Test again. Oh my... Error again! It's saying email is not verified. Seems that we need to set up Amazon SES service.
Setup Amazon SES
Amazon SES requires that you verify your identities (the domains or email addresses that you send email from) to confirm that you own them, and to prevent unauthorized use. Follow the steps outlined in the Amazon SES user guide to verify your sender e-mail.
Go to Services --> Simple Email Service --> Manage Identities --> Email addresses. Add your email. Receive a verification one and here we go! It's all ready to use.
Now go back to Lambda and click Test. If everything okay you will get a new email:
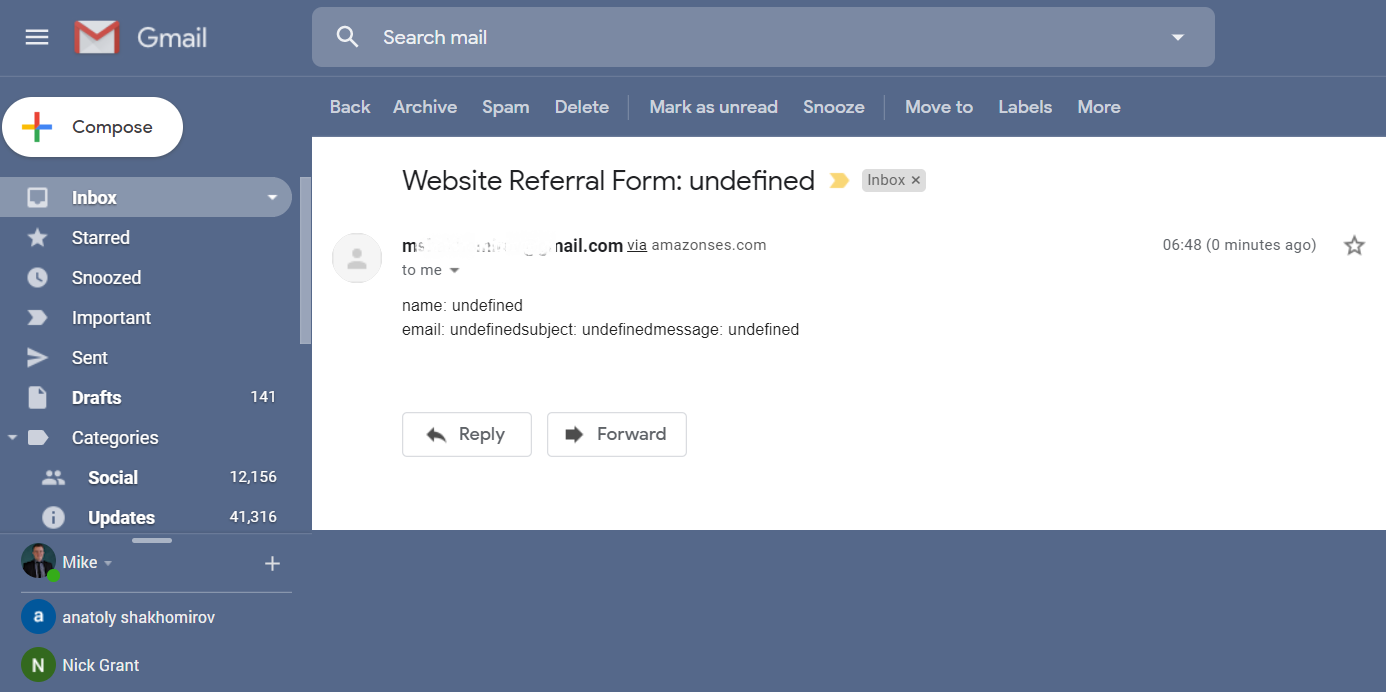
Give it a few minutes to finish the verification. Now you can send emails from your domain. Go back to your lambda, make sure email addresses match to verified domain name and click test. Hell yeah! It works! Remember that lambda MUST return a response otherwise you will get something like this in your browser:
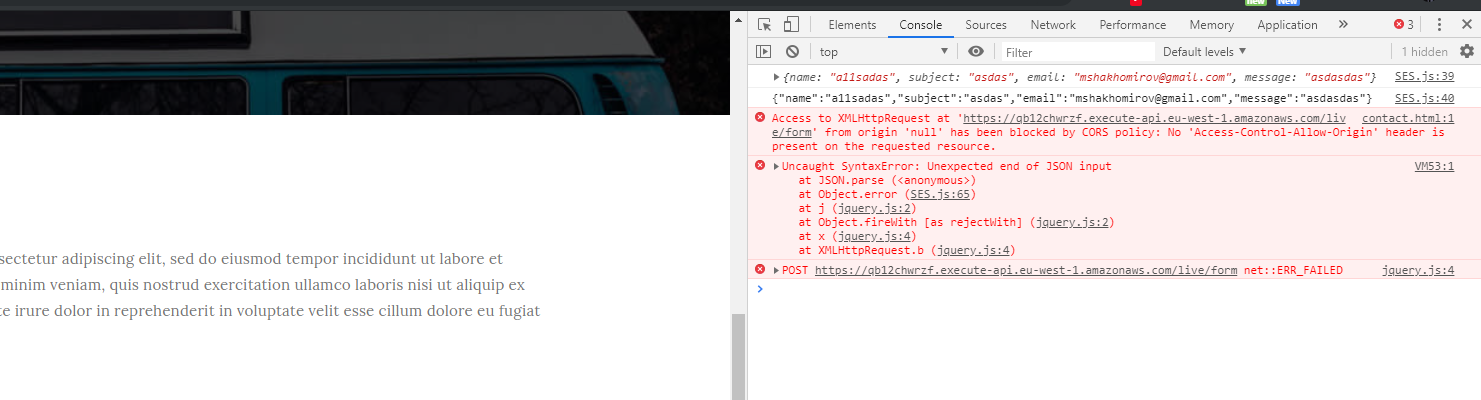
Also Lambda must have 'Access-Control-Allow-Origin': '*' otherwise response won't be accepted. As a security measure, you should avoid setting * as Origin the API Gateway. Sure, you can do it while you develop, but once you go to PROD, you should only allow the sites that should have access to it.
Connecting your Lambda to a website form
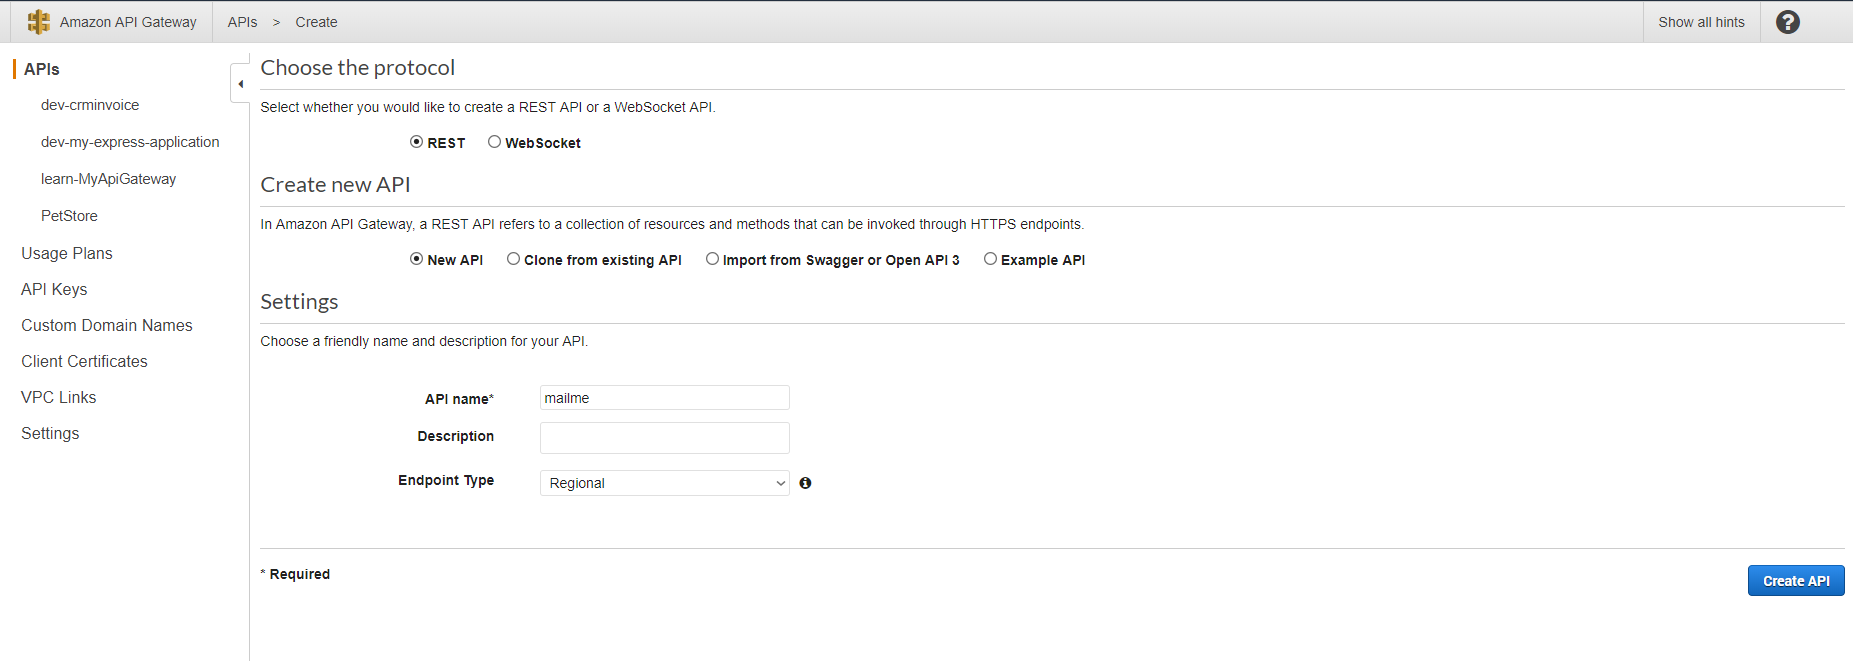
We will use POST request to send Form data from our website. But first we need to create an endpoint to catch it! Go to Services --> Api gateway:
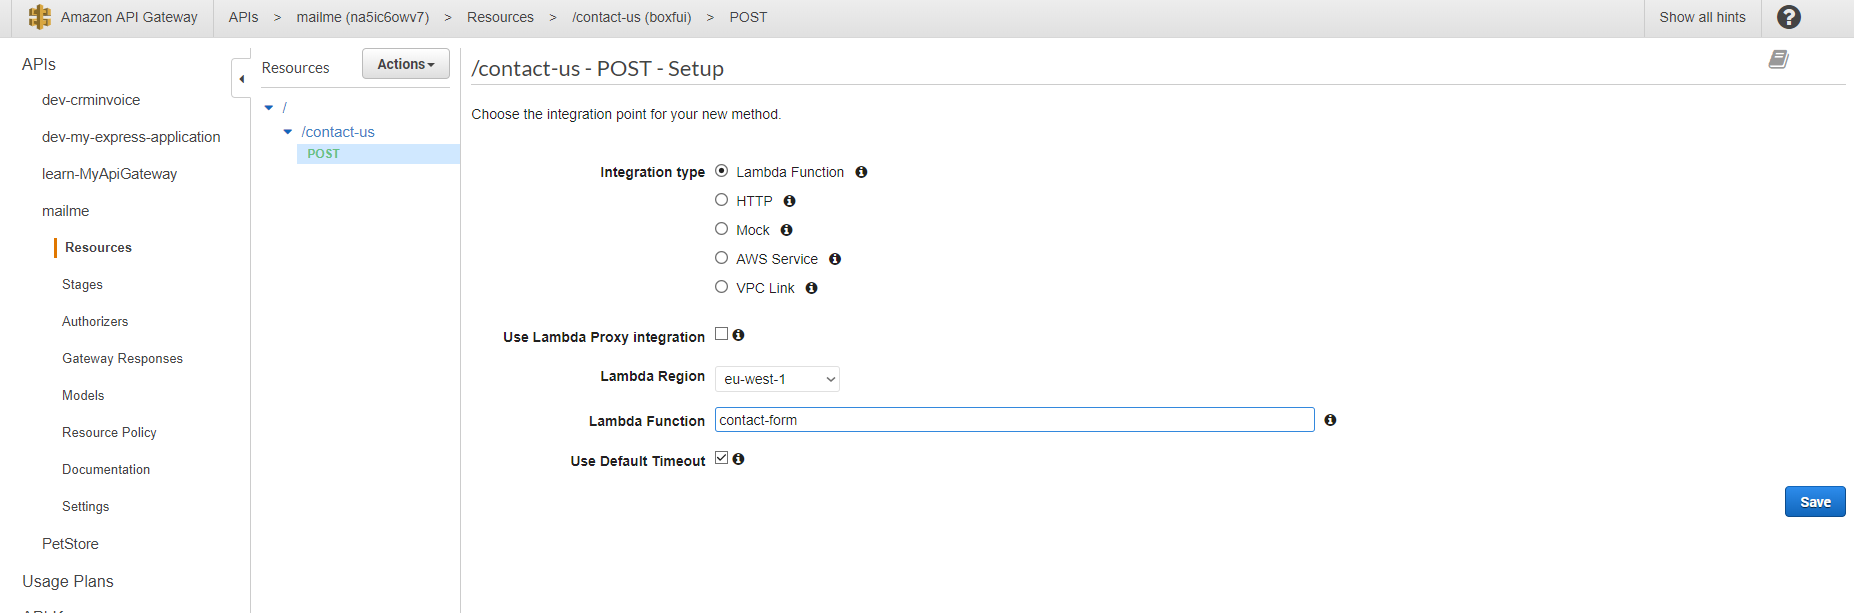
Now go to your API name — listed in the left-hand navigation — click on the “actions” drop down, and select “create resource.” Select your newly-created resource and choose “create method.” Choose a POST. Here, you will choose our AWS Lambda Function. To do this, type 'contact-form'. Make sure to Enable CORS in the API Gateway or you’ll get an error:”Cross-Origin Request Blocked: The Same Origin Policy disallows reading the remote resource at https://qb12chwrzf.execute-api.eu-west-1.amazonaws.com/live/contact-form. (Reason: CORS header ‘Access-Control-Allow-Origin’ missing).”
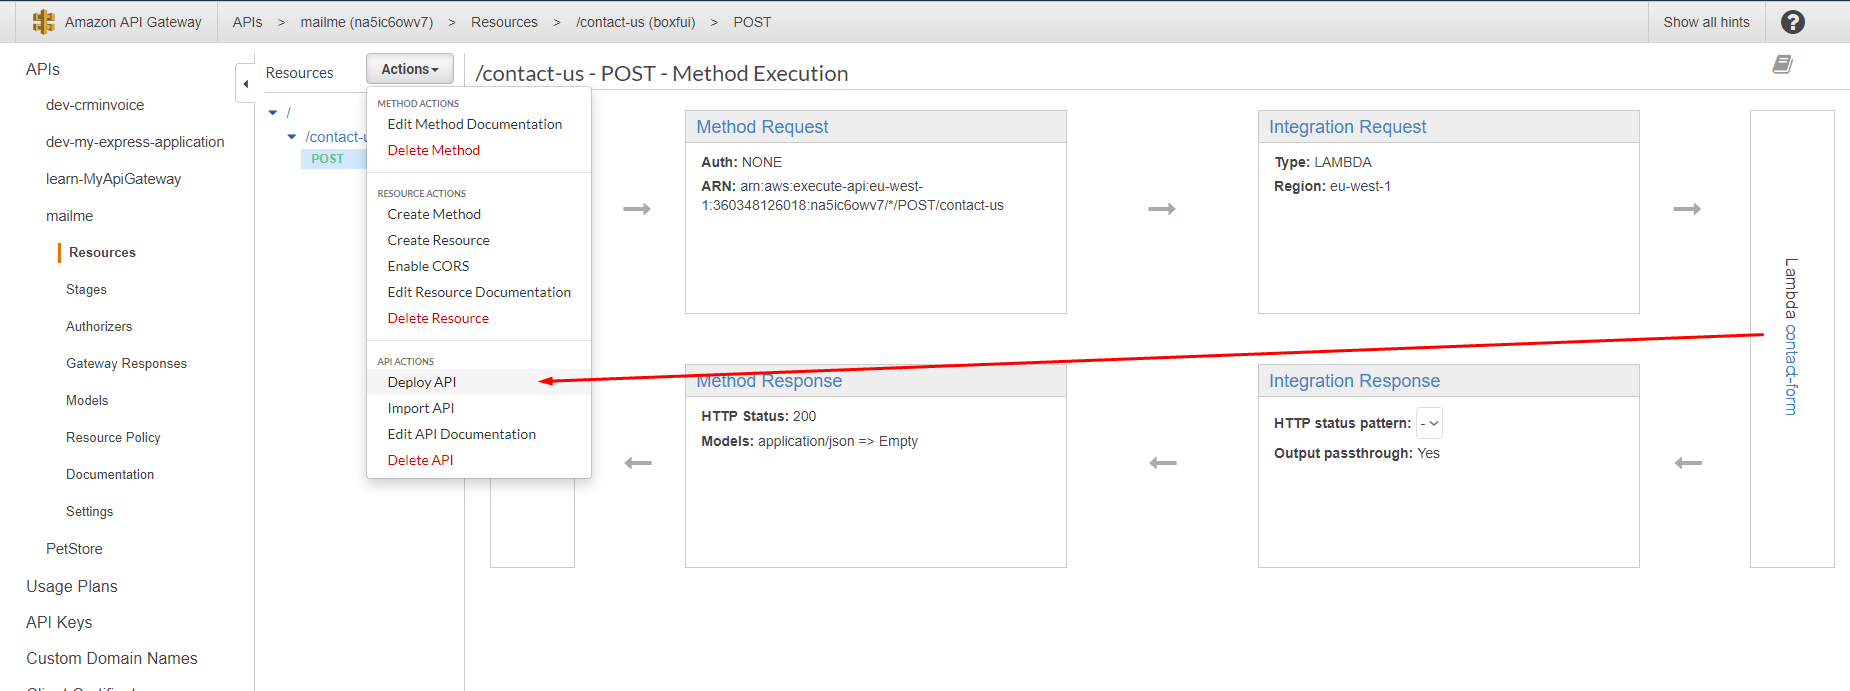
Click Save --> Deploy API -- Call new stage 'live'. Copy your invoke URL, e.g. https://na5ic6owv7.execute-api.eu-west-1.amazonaws.com/live/contact-form
Add POST request to your ./https://mydataschool.com/contact.html
Add this line inside HEAD section:
<script src="SES.js"></script>
Then create SES.js in ./ of your website folder:
function submitToAPI(e) {
e.preventDefault();
var URL = "https://qb12chwrzf.execute-api.eu-west-1.amazonaws.com/live/contact-form";
var Namere = /[A-Za-z]{1}[A-Za-z]/;
if (!Namere.test($("#name-input").val())) {
alert ("Name is toooo short bb :)");
return;
}
// var mobilere = /[0-9]{10}/;
// if (!mobilere.test($("#phone-input").val())) {
// alert ("Please enter valid mobile number");
// return;
// }
if ($("#email-input").val()=="") {
alert ("Please enter your email id");
return;
}
var reeamil = /^([\w-\.]+@([\w-]+\.)+[\w-]{2,6})?$/;
if (!reeamil.test($("#email-input").val())) {
alert ("Please enter valid email address");
return;
}
var name = $("#name-input").val();
// var phone = $("#phone-input").val();
var email = $("#email-input").val();
var subject = $("#subject-input").val();
var message = $("#message-input").val();
var data = {
name : name,
subject : subject,
email : email,
message : message
};
console.log(data);
console.log(JSON.stringify(data));
$.ajax({
type: "POST",
url: "https://qb12chwrzf.execute-api.eu-west-1.amazonaws.com/live/contact-form",
dataType: "json",
crossDomain: "true",
contentType: "application/json; charset=utf-8",
data: JSON.stringify(data),
success: function (xhr) {
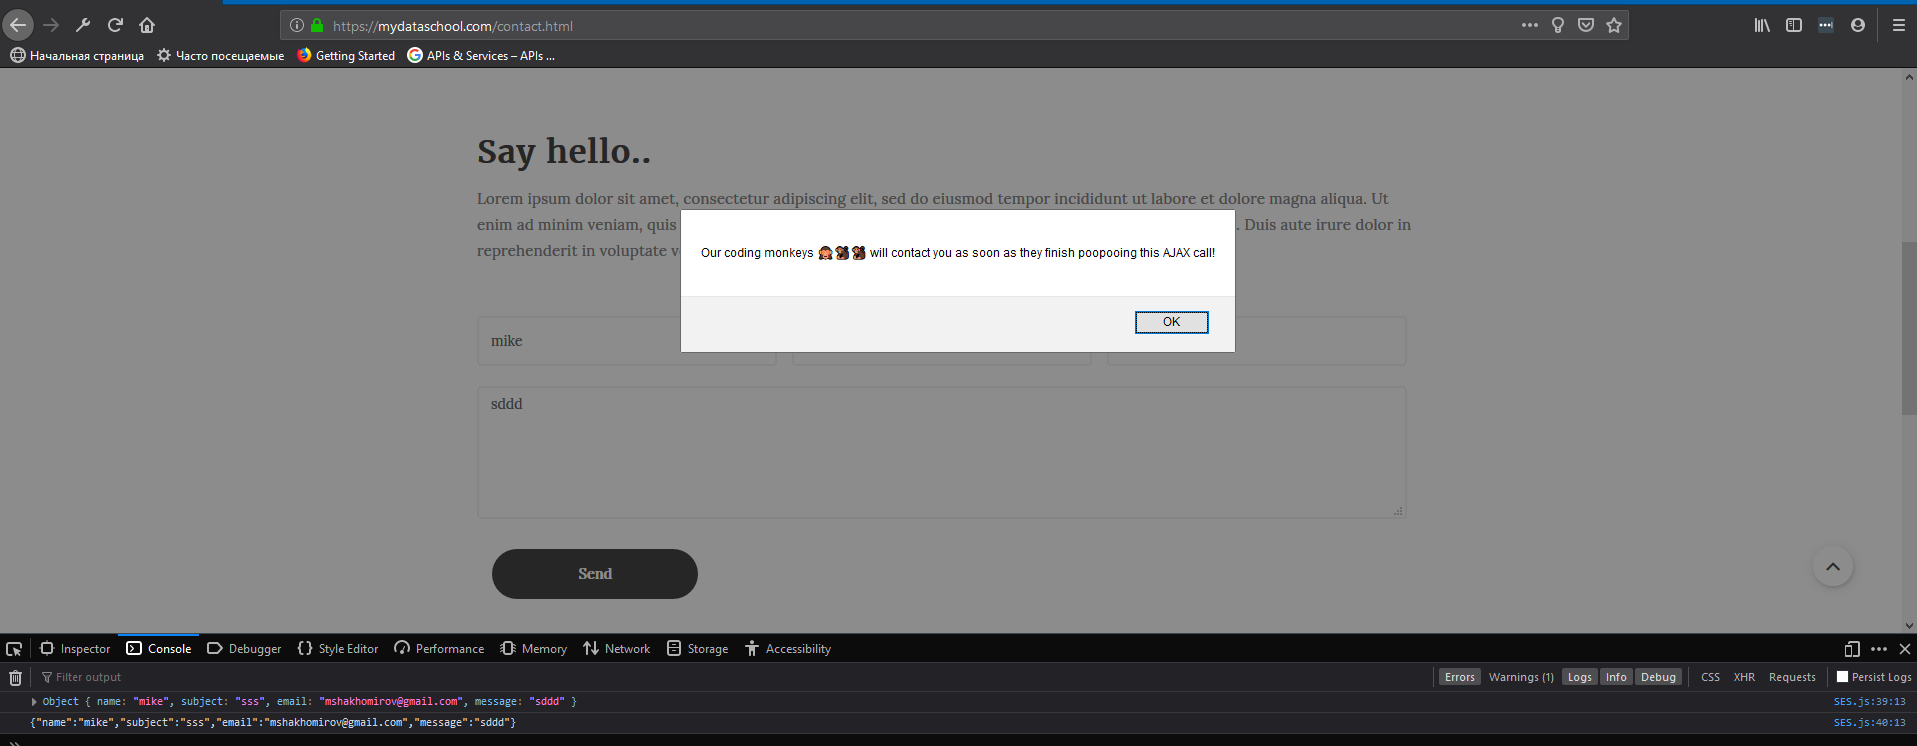
// clear form and show a success message
alert("Our coding monkeys 🙈🐒🐒 will contact you as soon as they finish poopooing this AJAX call!");
document.getElementById("contact-form").reset();
location.reload();
},
// error: function () {
// // show an error message
// alert("Our coding monkeys 🙈🐒🐒 will contact you as soon as they finish poopooing this Java script!");
// }
error: function (xhr) {
var err = JSON.parse(xhr.responseText);
alert(err.message);
}
});
}
Great! We have just finished the Part 1 of custom invoice application!
Full code for this part can be found here: app.js
We covered such topics as as user authentication and API requests to 3rd party apps. Next in Part 2 we will add proper user authentication and authorization with Google, connect it to redis , Quotient and start working with database.
Thanks for reading!

Mike
Mike is a Machine Learning Engineer / Python / Java Script Full stack dev / Middle shelf tequila connoisseur and accomplished napper. Stay tuned, read me on Medium https://medium.com/@mshakhomirov/membership and receive my unique content.
Comments
David Jones
3 days agoAliquam gravida arcu at risus blandit, in interdum metus varius. Cras efficitur, ex sit amet tincidunt rhoncus, dui ex hendrerit risus, ac dapibus ligula mi id leo. In auctor dui justo, ac consequat dui posuere ac.